Raspberry Pi OS:
First, you will need to download the Raspberry Pi OS from the official website. You can download the imager utility from the Useful Links section.
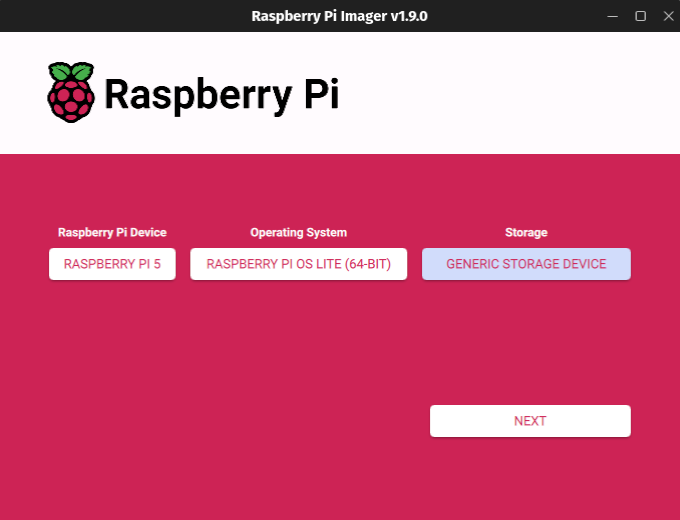
Once you have downloaded the imager you can follow these steps:
- Select the Rapsberry Pi device you will use, in my case is the Raspberry Pi 5.
- Select your Operating System, we are going to select Raspberry PI OS LITE (64-BIT)
- Select your storage. Make sure you are making the right selection and click on NEXT.
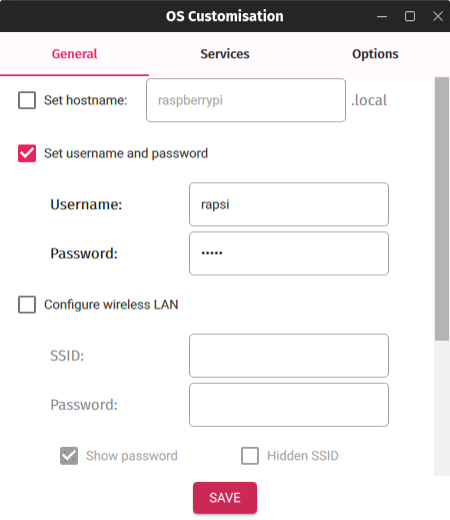
- Click on EDIT SETTINGS on the Use OS Customisation window.
- In the General tab we write our user name and password, I set my username to rapsi. Here you can also add your Wifi credentials.
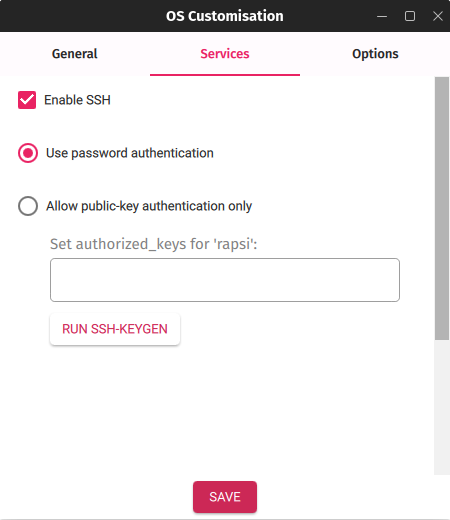
- In the Services tab we Enable SSH and use password authentication and click on SAVE.
- Click on YES in the Use OS Customisation window.
- Follow the promps to finalize the OS image download!
Initial Router Setup:
We need to be able to go into our routers settings to be able to confgure our network the way we need to for our Raspberry Pi to serve as our DNS server and our VPN Server.
These are the next steps:
- Connect the Ethernet cable to your router and to your Raspberry Pi.
- Grab the microSD card and insert it into your Raspberry Pi and power it up.
- Log into your routers admin web page and find the Raspberry Pi device name. If you left the default hostname it should be raspberrypi.
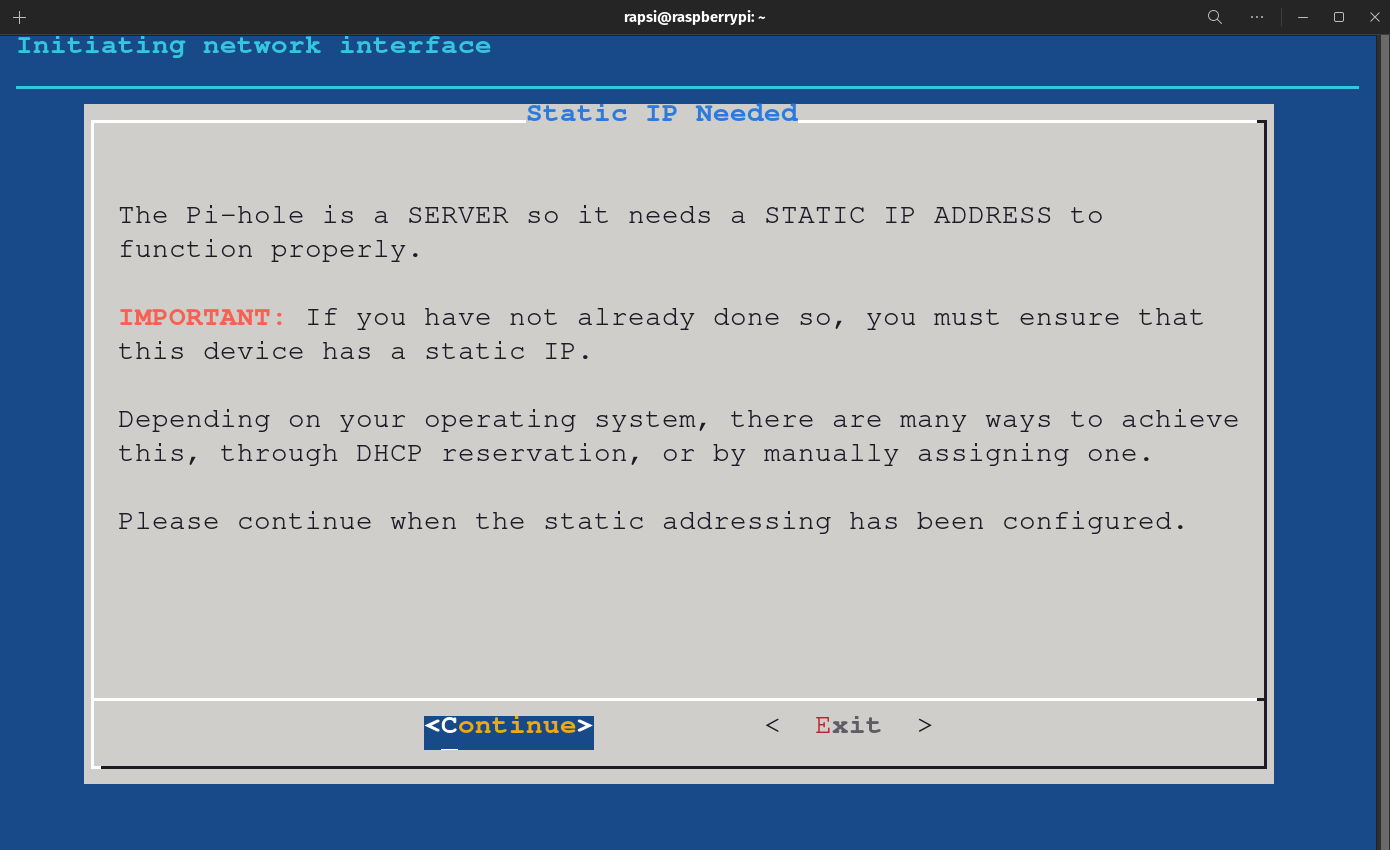
- Reserve an IP Address for you Rasbperry Pi in the DHCP settings of your router. This is a better setting than setting a static IP in your Rasbperry Pi settings.
- Powercycle the Raspberry Pi to make sure the settings take effect.
We are going to come back to the router after we have set up Pi-Hole and WireGuard to do two things: Modify the DHCP settings of the router to use the IP Address of the Rasperry Pi as the primary DNS server and set the portforwarding rules for our DNS and VPN services.
Connecting to and Upgrading the Raspberry Pi:
There are a couple of ways that we can interface with your Raspberry Pi. You have the option to connect a keyboard and a monitor to it or we can do it via SSH. I will connect via SSH since that is my prefered method to but you can do one or the other, or both.
These are the next steps:
- Open your command prompt (Windows) or your terminal (MacOS/Linux) and type: ssh yourUsername@yourRaspberry_IP or ssh yourUsername@raspberrypi.local if you left the default hostname.
- Since this is the first time connecting to your Raspberry Pi, you will be asked to accept the connection. Type: Yes.
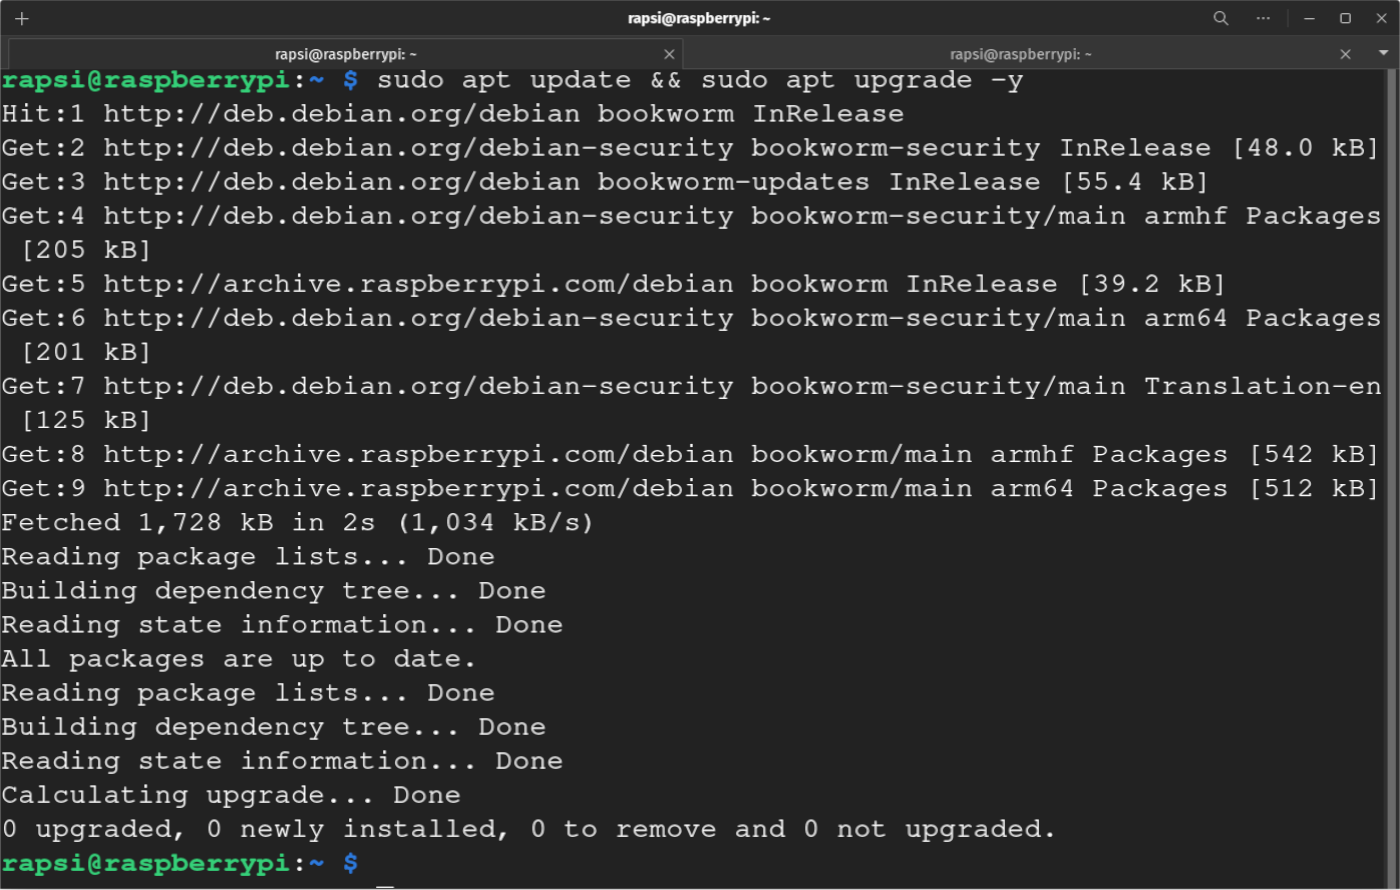
- Upgrade the Raspberry Pi with the command: sudo apt update && sudo apt upgrade -y
- Wait for the upgrades to complete, this might take several minutes. Depending on what was installed it is a good idea to reboot wih the command: sudo reboot now.

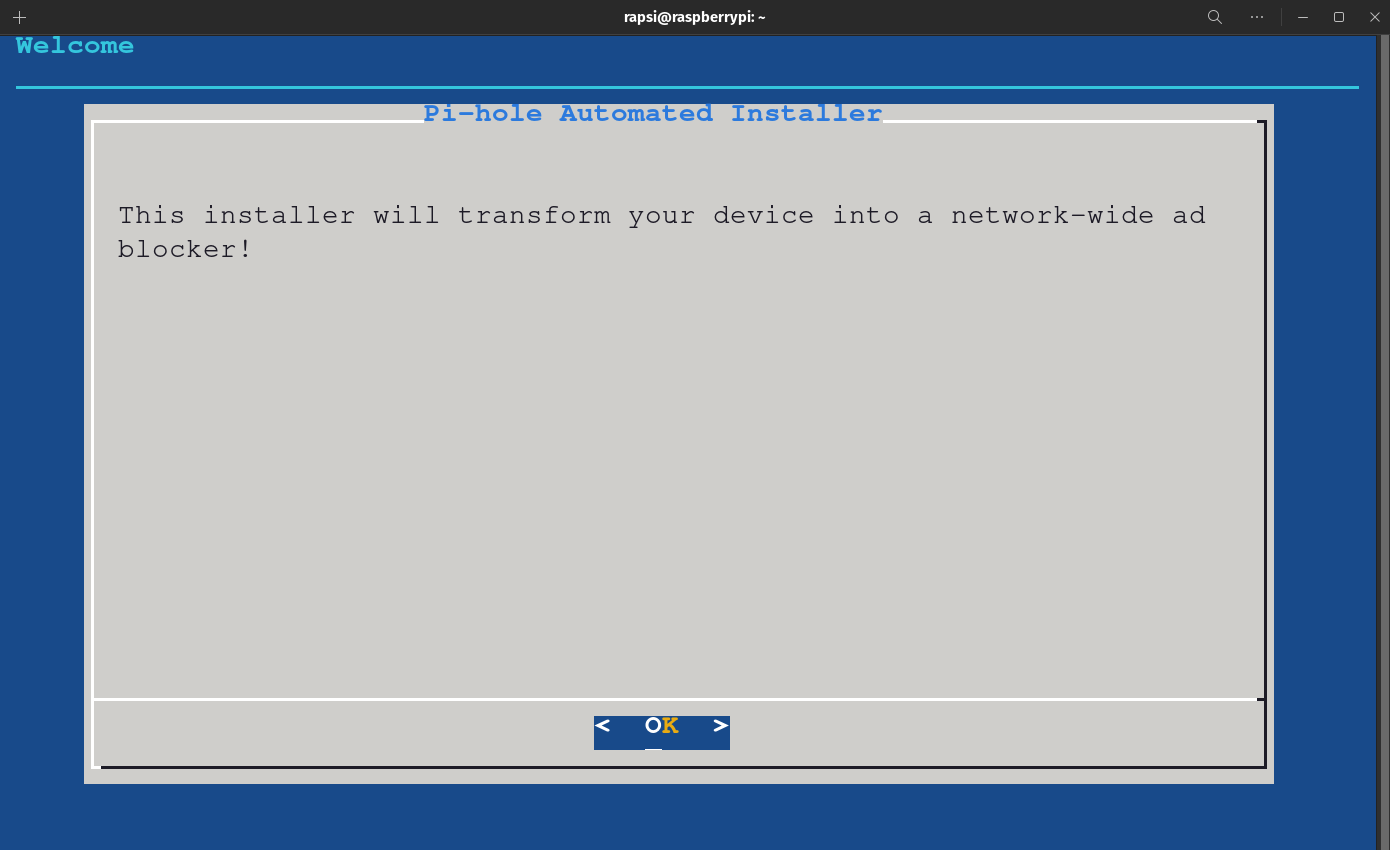
Setting up Pi-Hole Ad-Blocker:
There are a few methods to install Pi-Hole. We are going to use the One-Step Automaded Install recommended by the good folks at Pi-Hole.net. If you are interested in learning about the other alternatives click HERE.
These are the next steps:
- Open your command prompt (Windows) or your terminal (MacOS/Linux) and SSH into your Raspberry Pi.
- Download Pi-Hole by typing: curl -sSL https://install.pi-hole.net | bash
- Follow the prompts to install Pi-Hole.
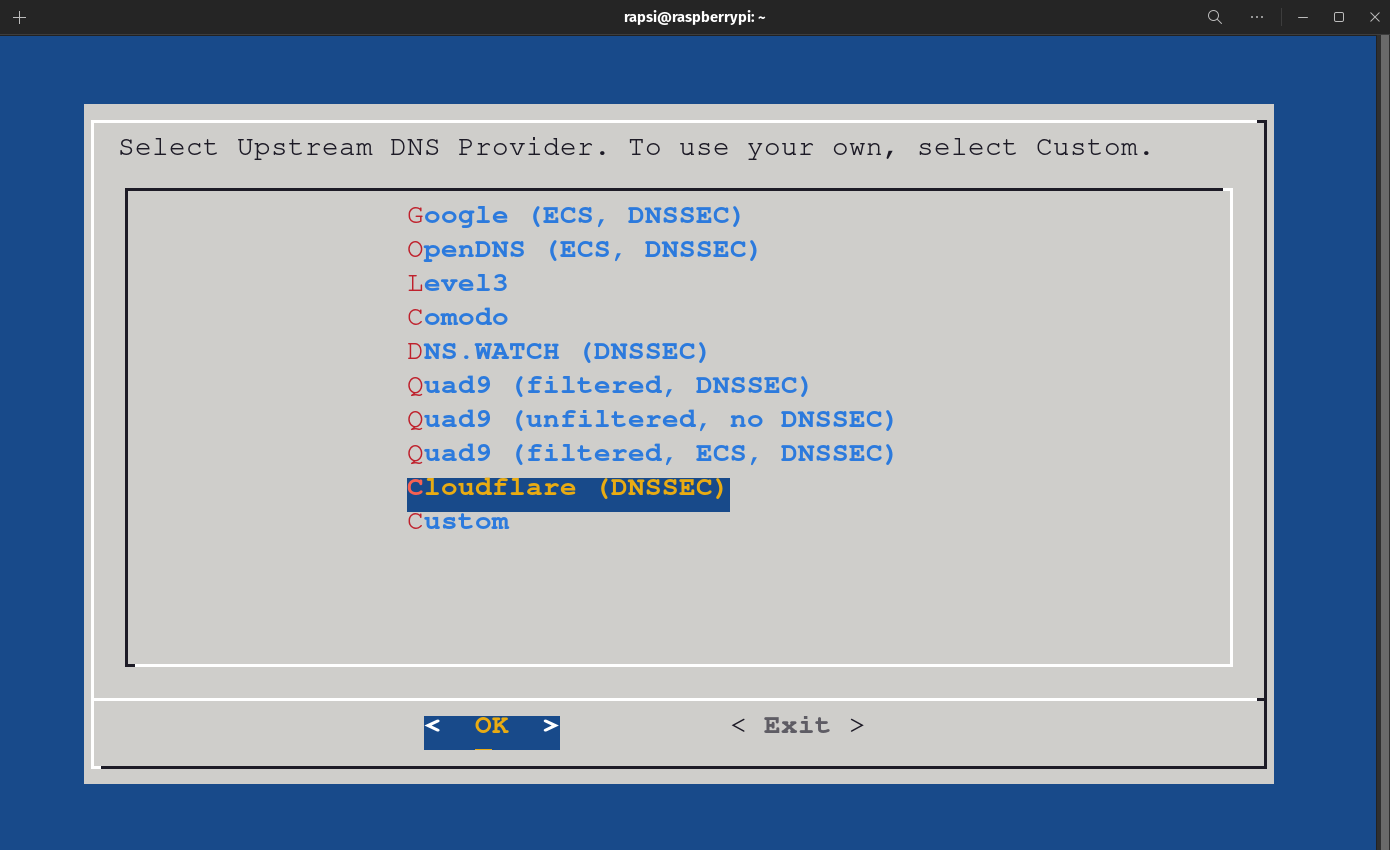
- Select the upstream DNS provider. I selected Cloudflare.
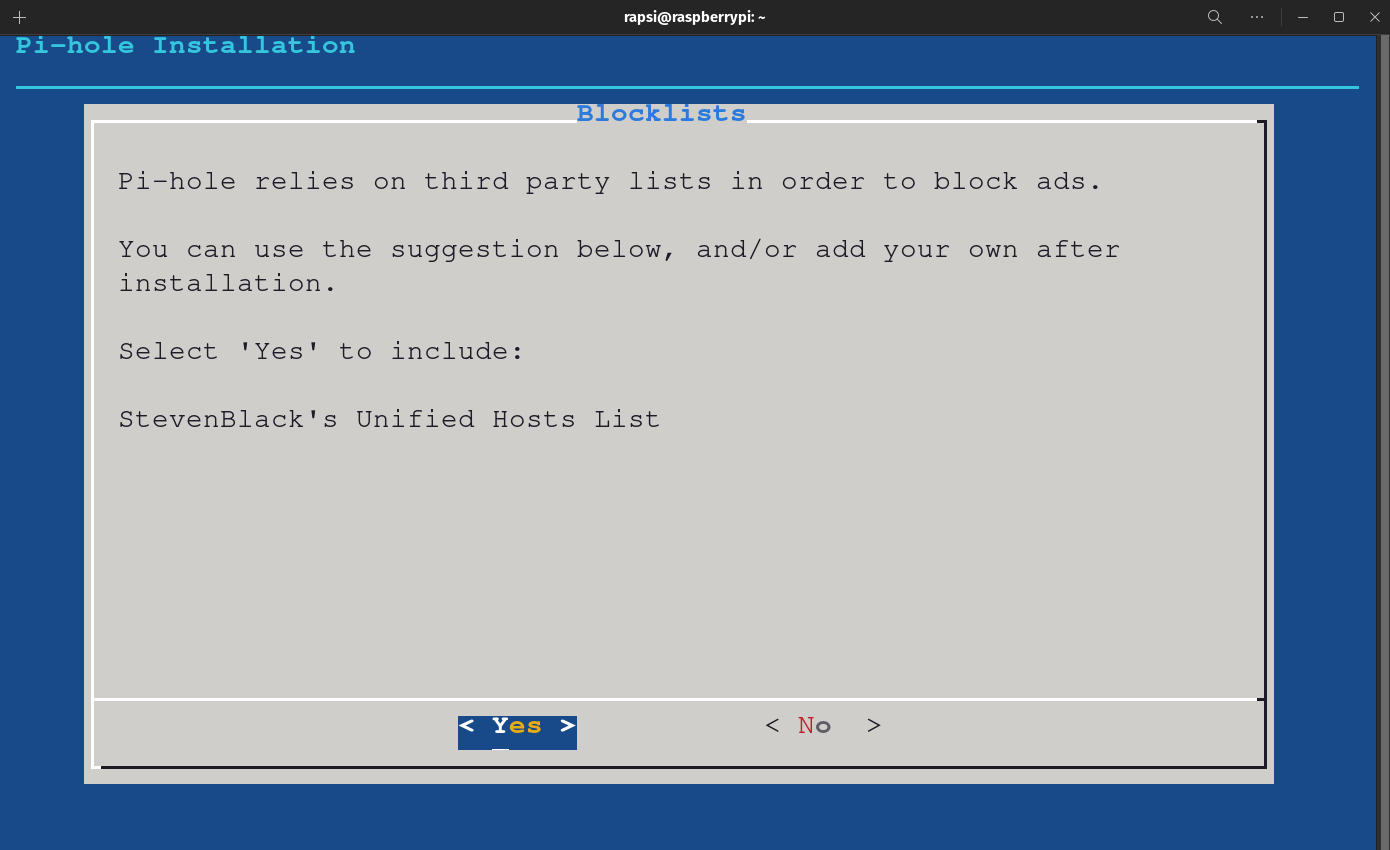
- Select Yes on the Blocklists selection screen. This will load a block list add for you. You can add more later if you wish.
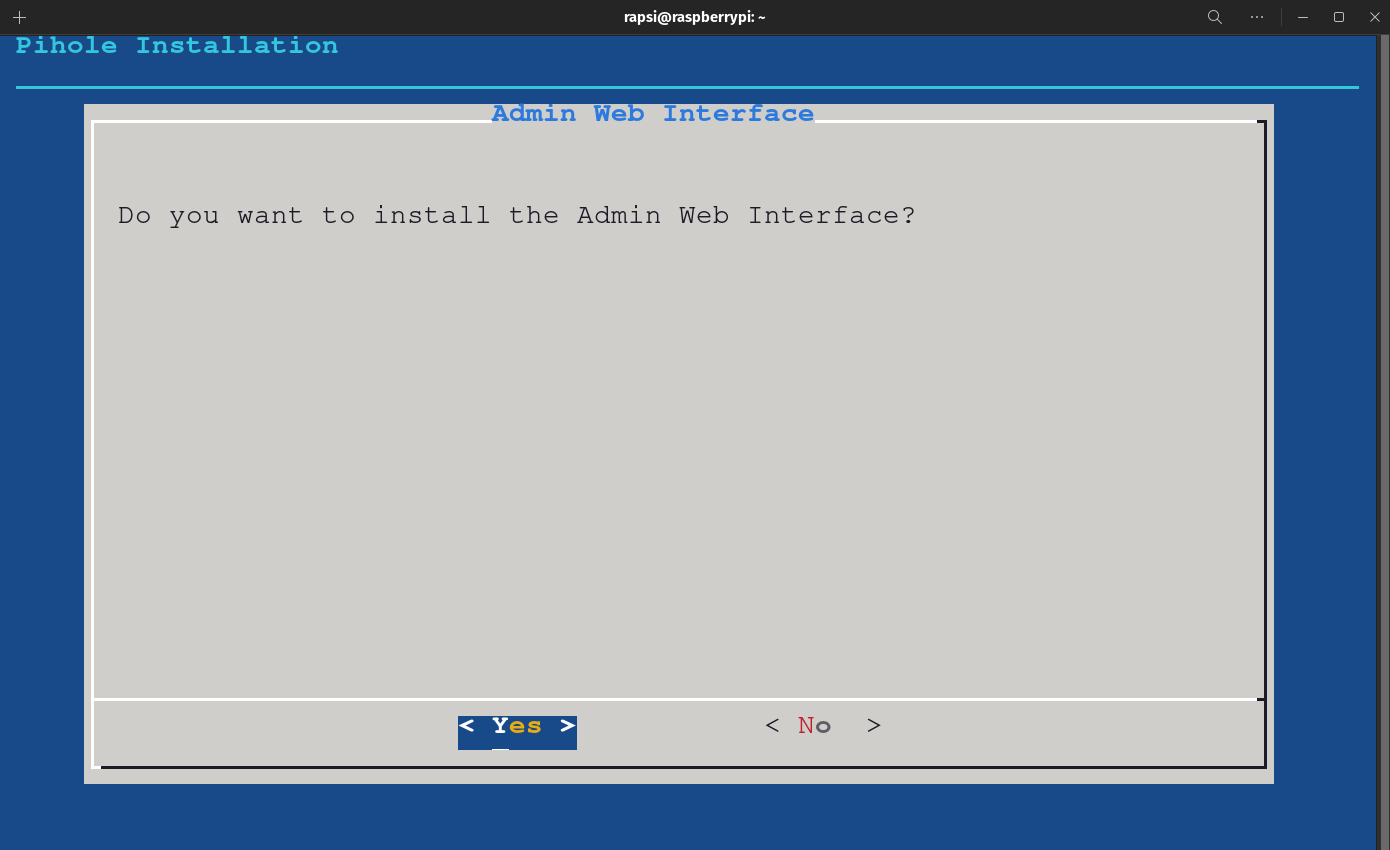
- Select Yes to install the Admin Web Interface.
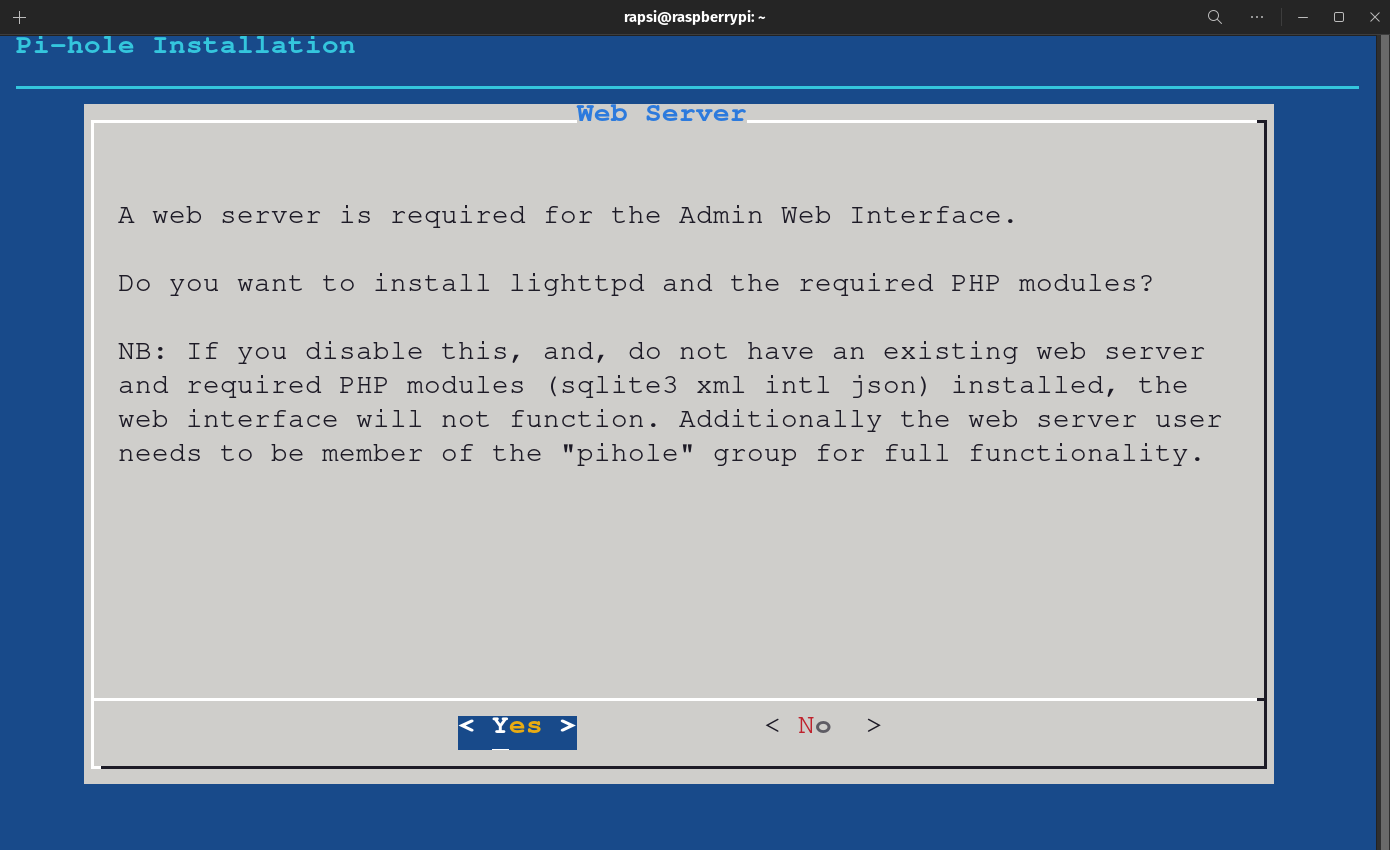
- Select Yes to install the Web Server.
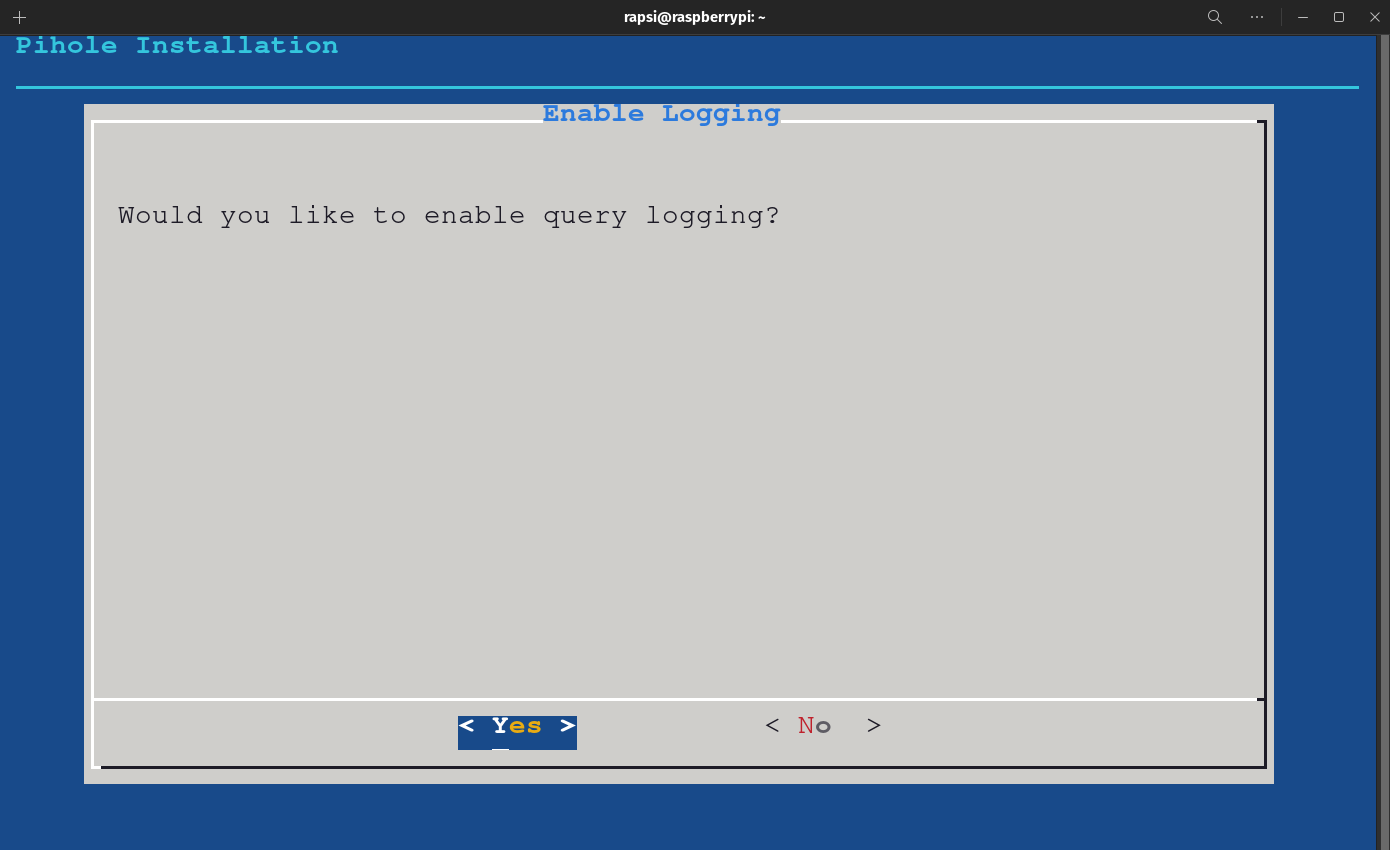
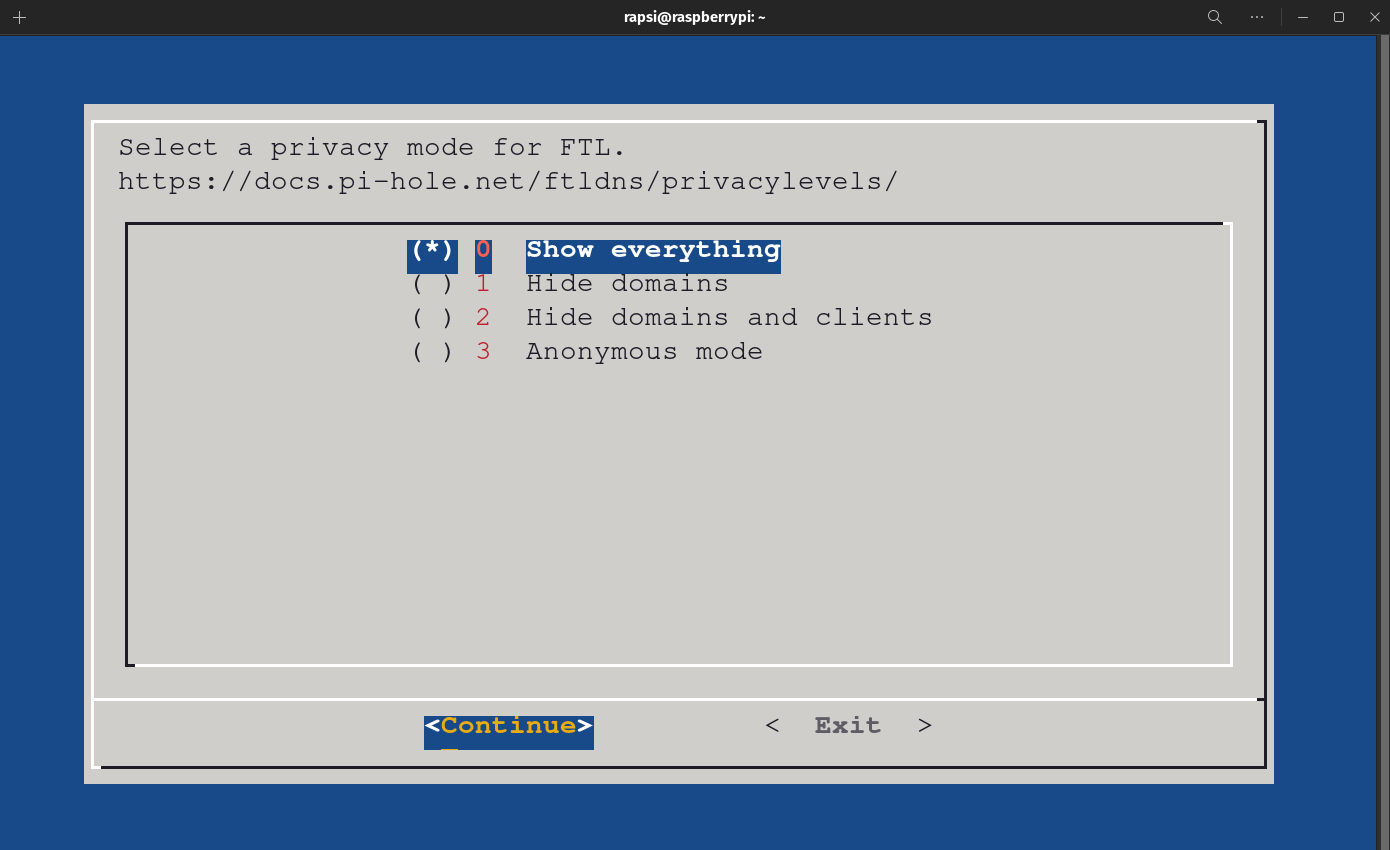
- Enable Logging is up to you. I selected yes to have data to analyze later on. If you select to enable logging, you will be prompted to selet a privacy setting in the next screen.
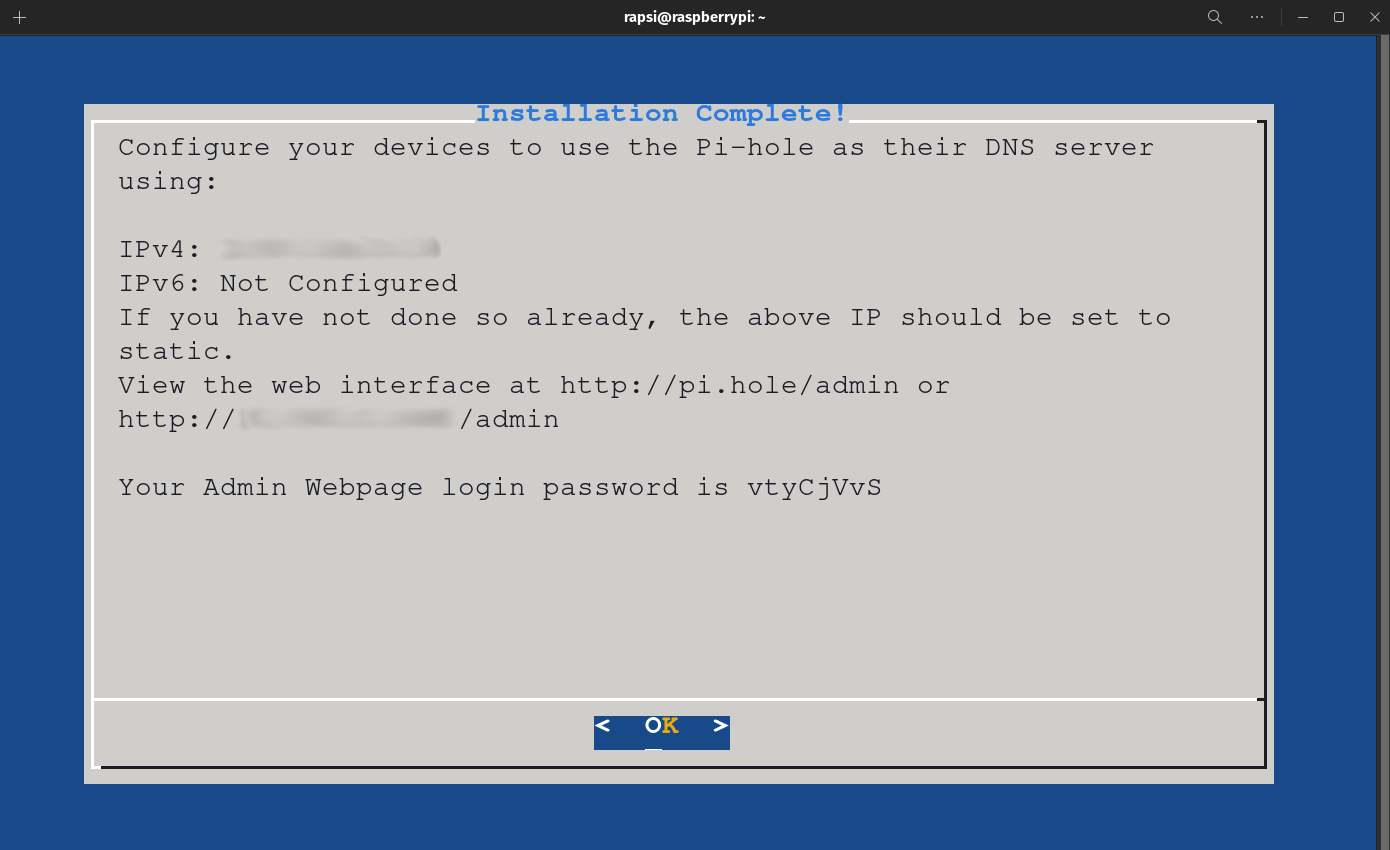
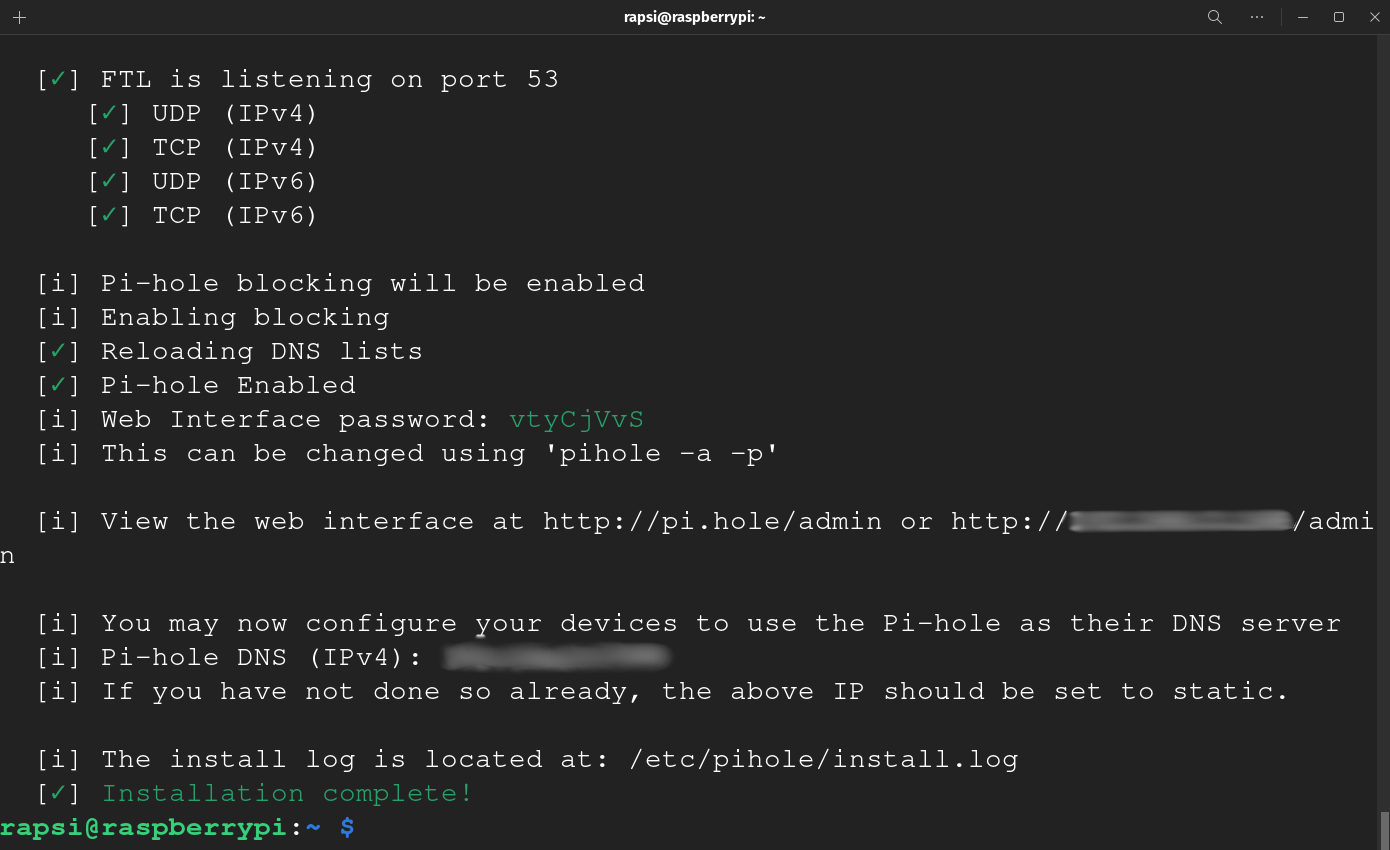
- Once the installation is complete, you will be given a password to log into the Pi-Hole Admin Console. Save this password.
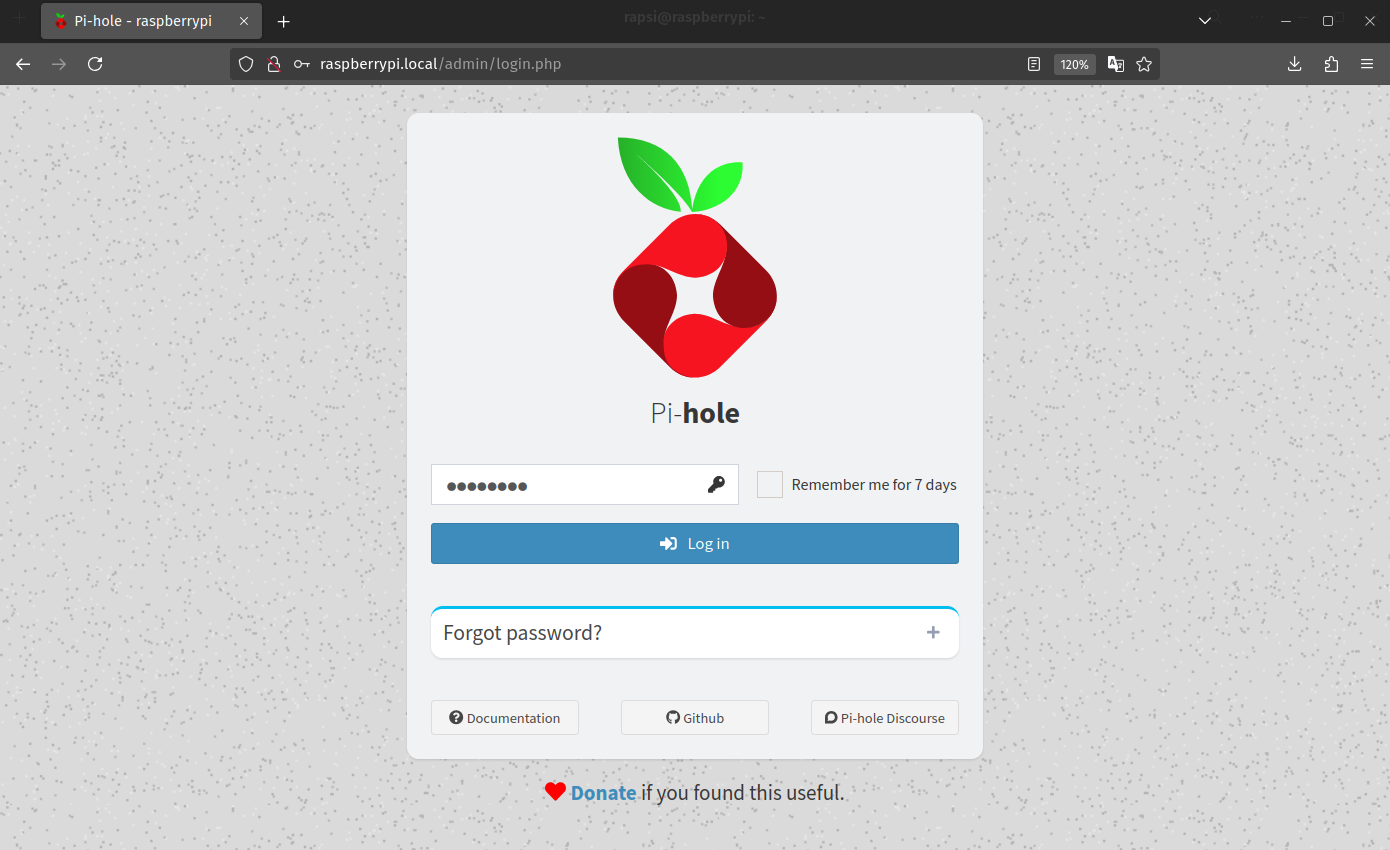
- Open your browser and type: http://yourRaspberryPi_IP/admin or http://raspberrypi.local/admin if you left the default hostname.
- Log in with the password you were given and you will be taken to the Pi-Hole Admin Console.
- The last step is to log into the router and change the DHCP settings. We need to change the primary DNS server to the Raspberry Pi IP Address.
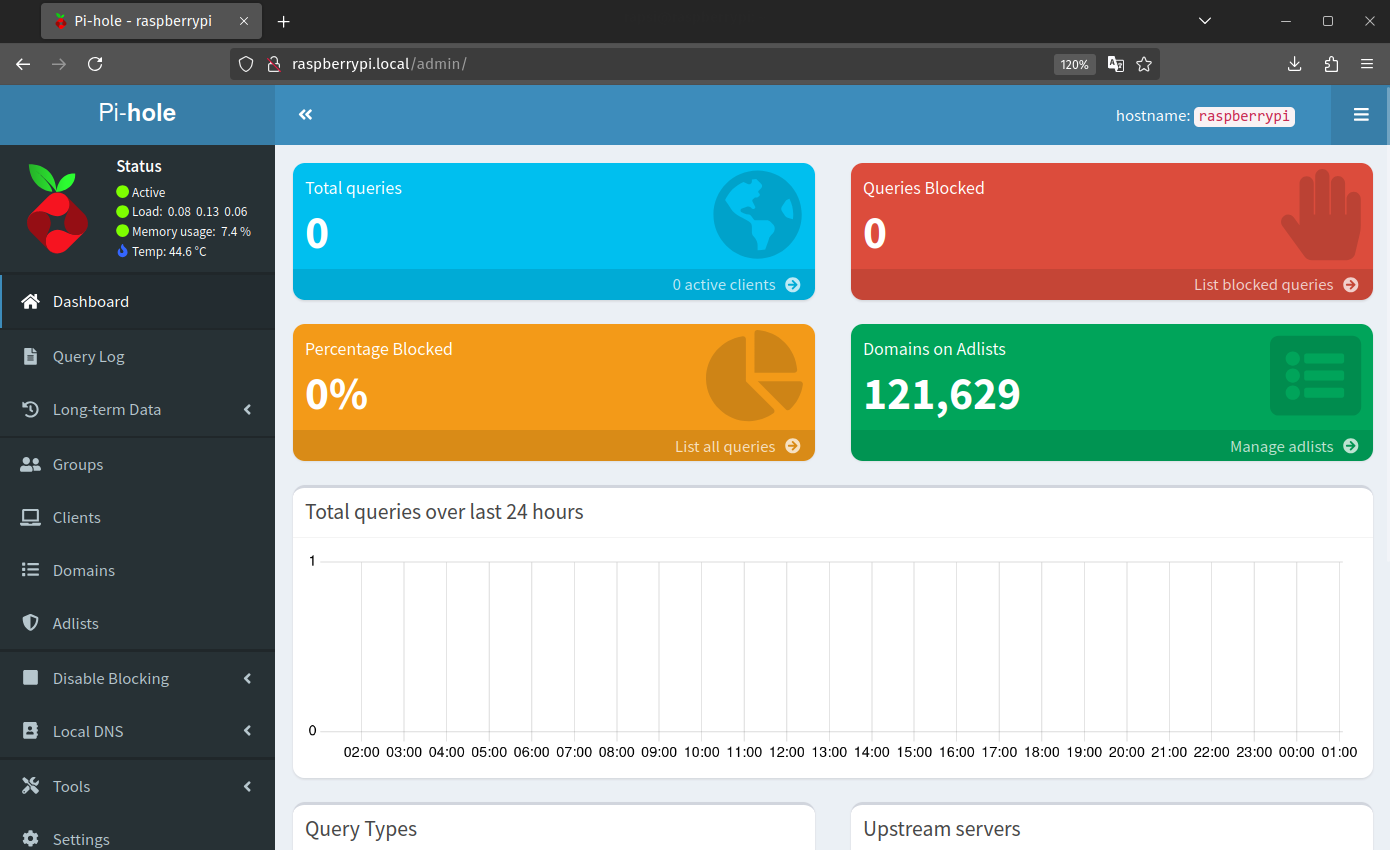
It is that simple to install Pi-Hole. From here you can always use the Admin Web Interface to make any changes, add block lists, analyze your traffic, etc.
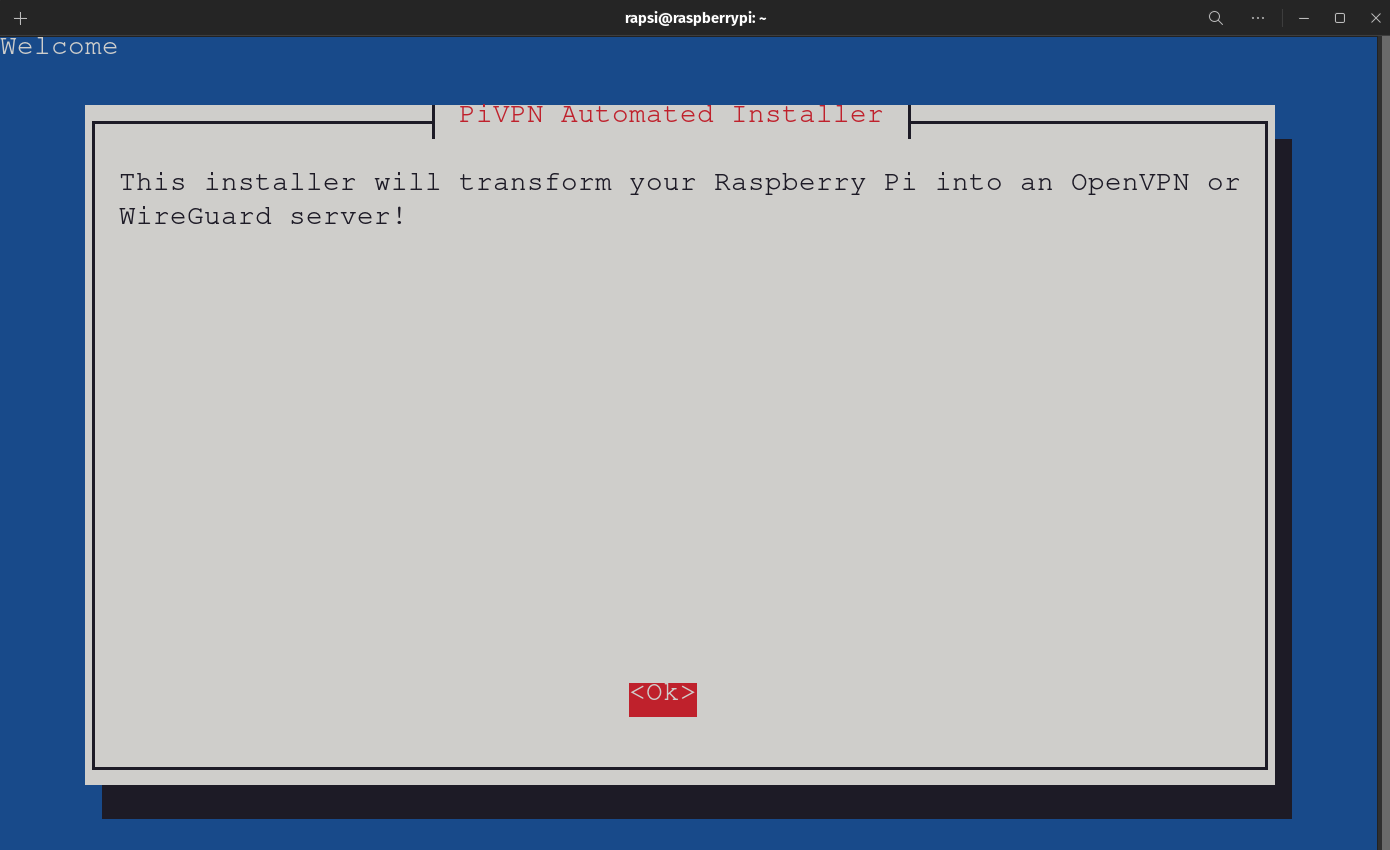
Setting up WireGuard VPN:
There are a few options when it comes to VPN software. For the Raspberry Pi, two good options are OpenVPN and WireGuard. We are going to use the download the Automated Installer from the good folks at PiVPN.io. During this installation you will have the option to pick one or the other.
I will be installing WireGuard, here is why: WireGuard is generally preferred over OpenVPN for its speed, simplicity, and modern security features. It has a smaller codebase, making it easier to audit and maintain, and uses efficient cryptographic algorithms for better performance. While OpenVPN is more mature and widely compatible, WireGuard's streamlined setup and enhanced performance make it a strong choice for many users.
These are the installation steps:
- Open your command prompt (Windows) or your terminal (MacOS/Linux) and SSH into your Raspberry Pi.
- Download PiVPN by typing: curl -L https://install.pivpn.io | bash
- Follow the prompts to install PiVPN - WireGuard.
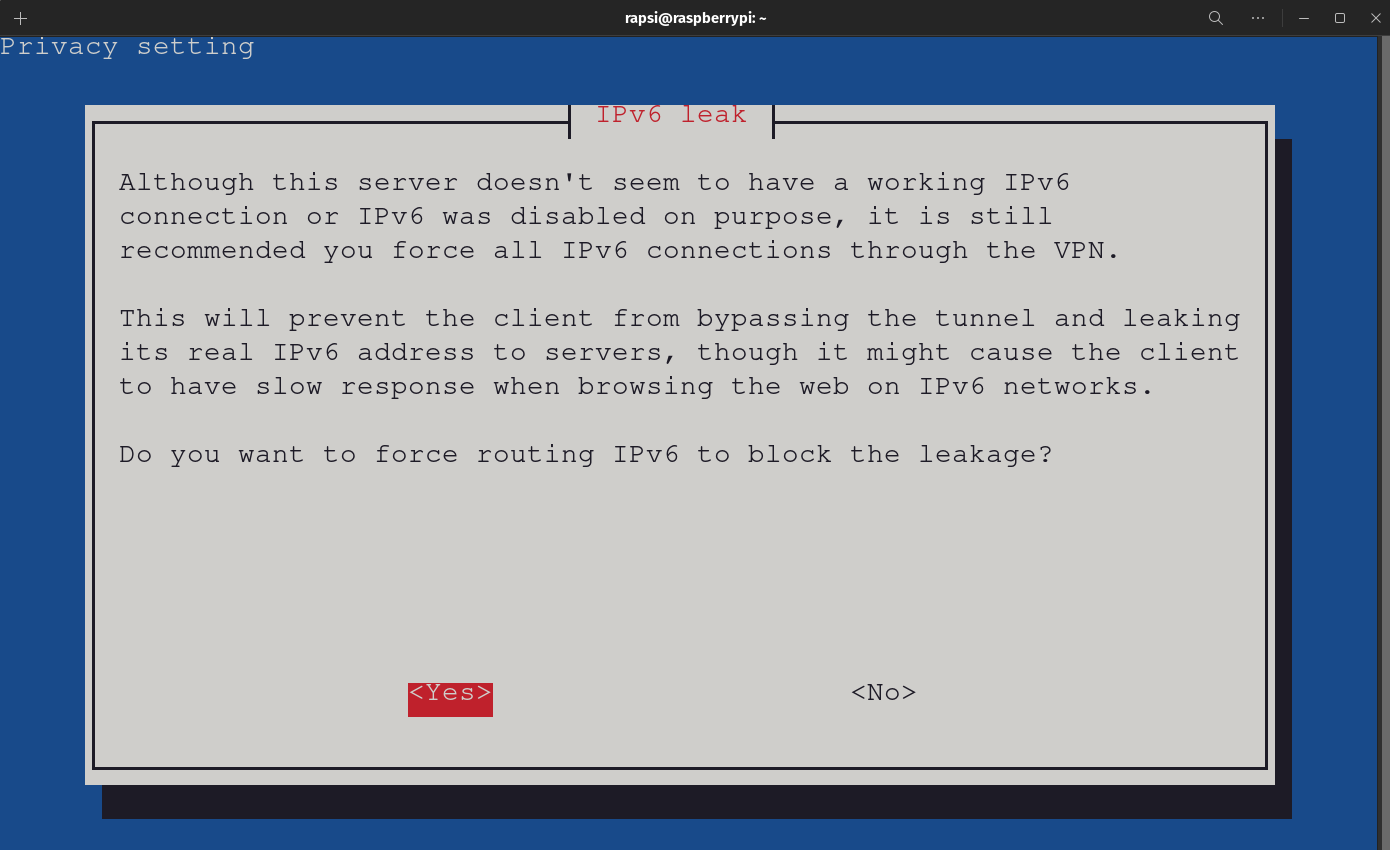
- Select Yes to force IPv6 routing.
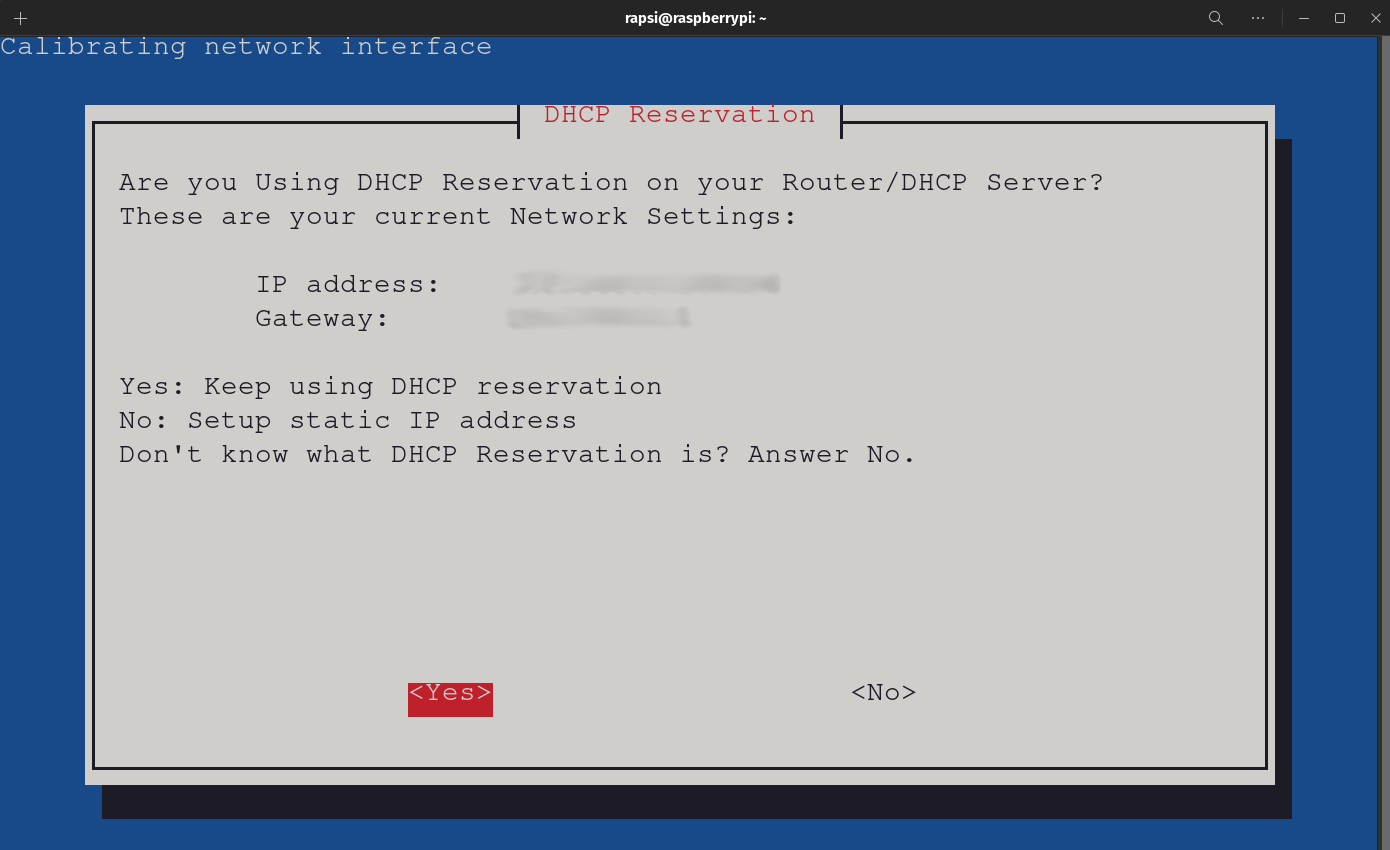
- Select Yes on the DHCP Reservation screen.
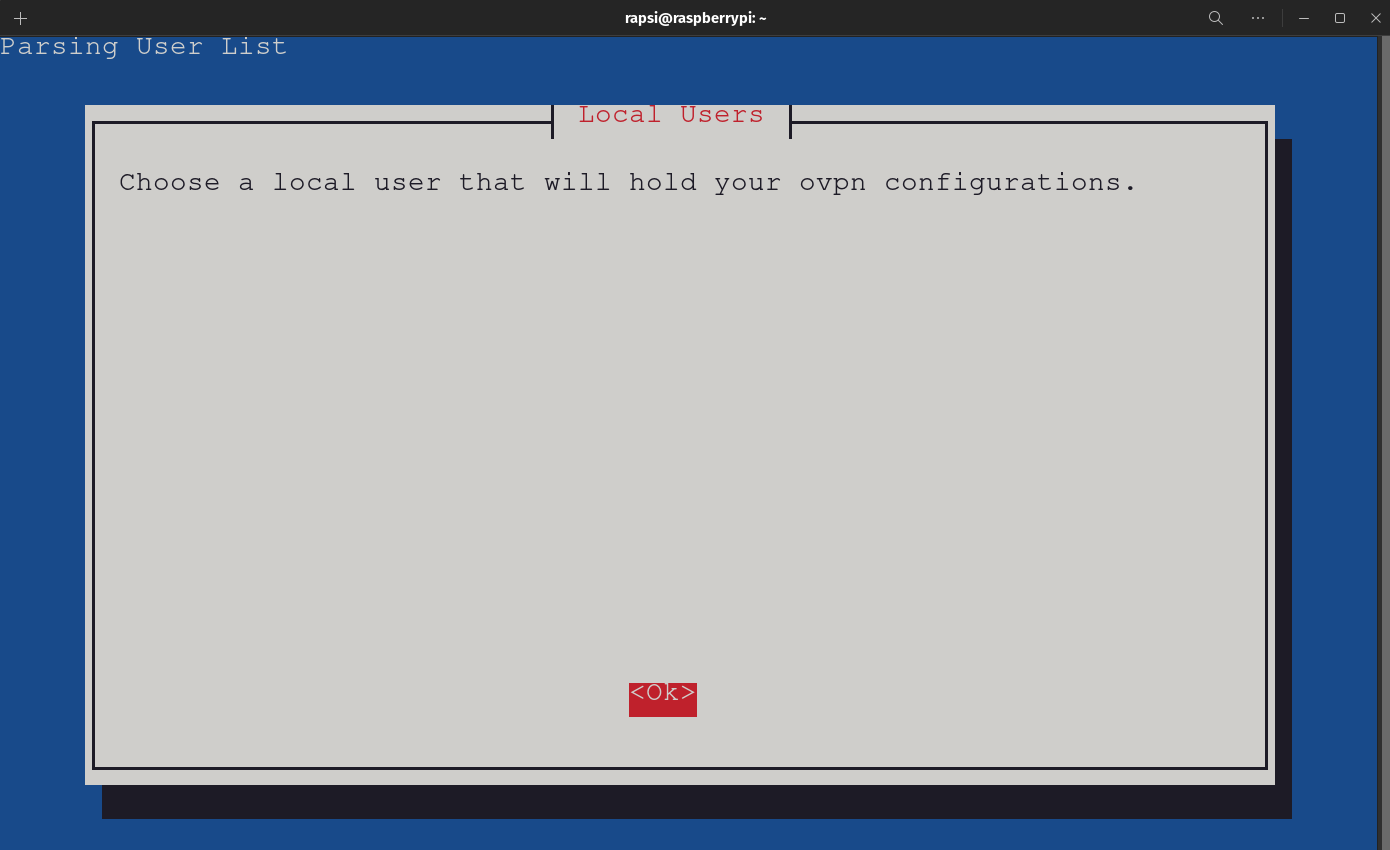
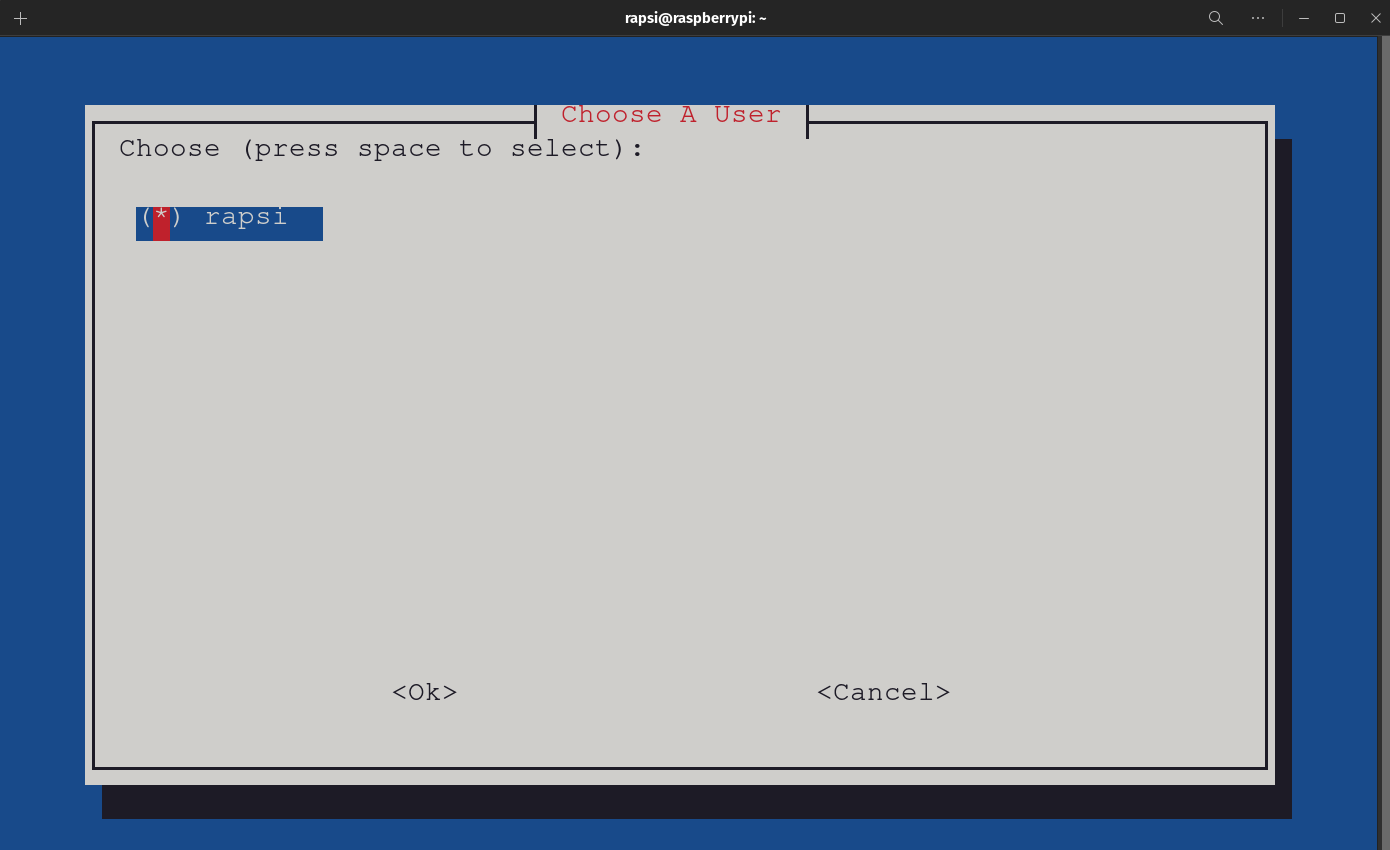
- Select the user you want to hold the VPN configuration, for me is rapsi.
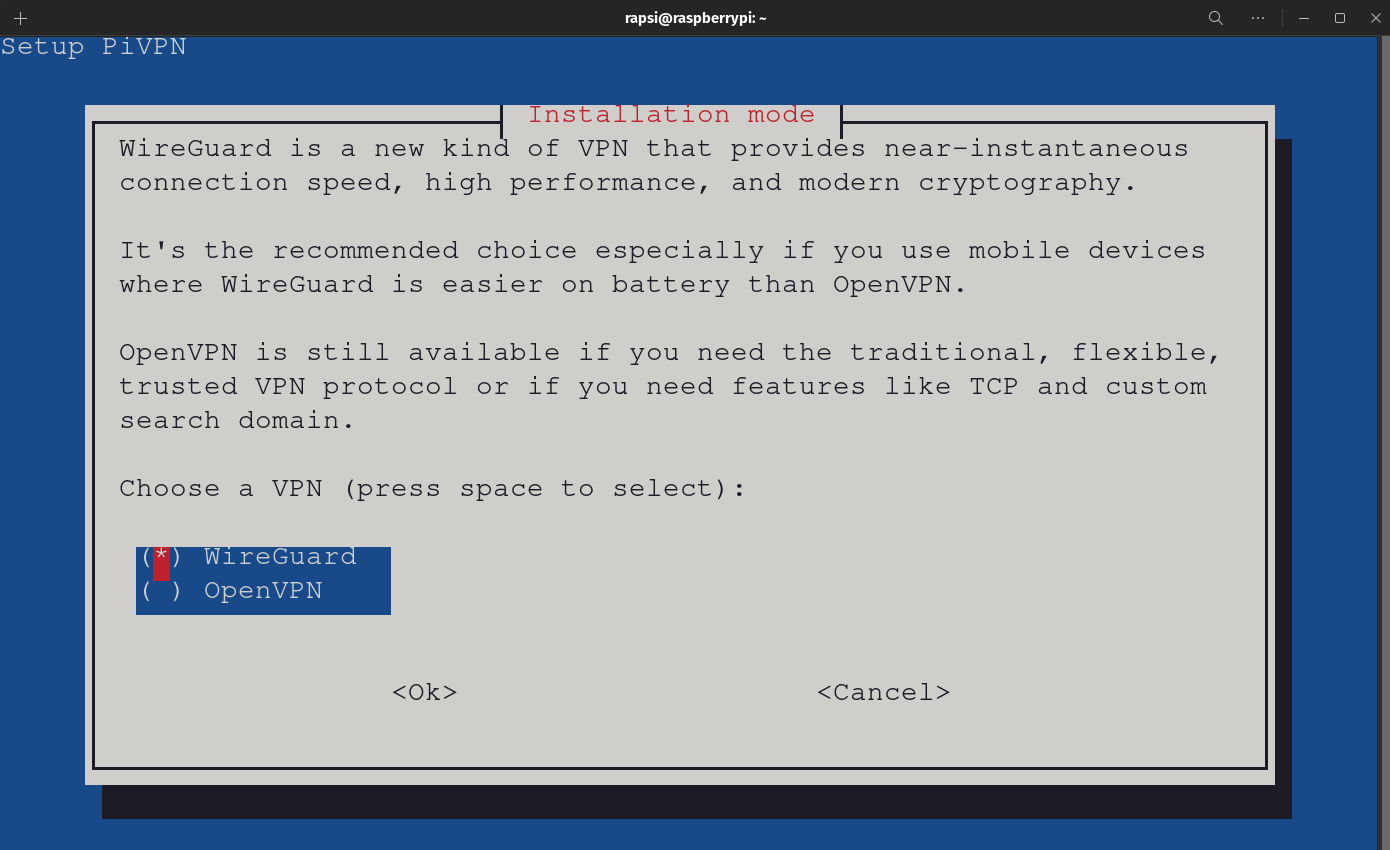
- On the Installation Mode screen we are going to select WireGuard and OK.
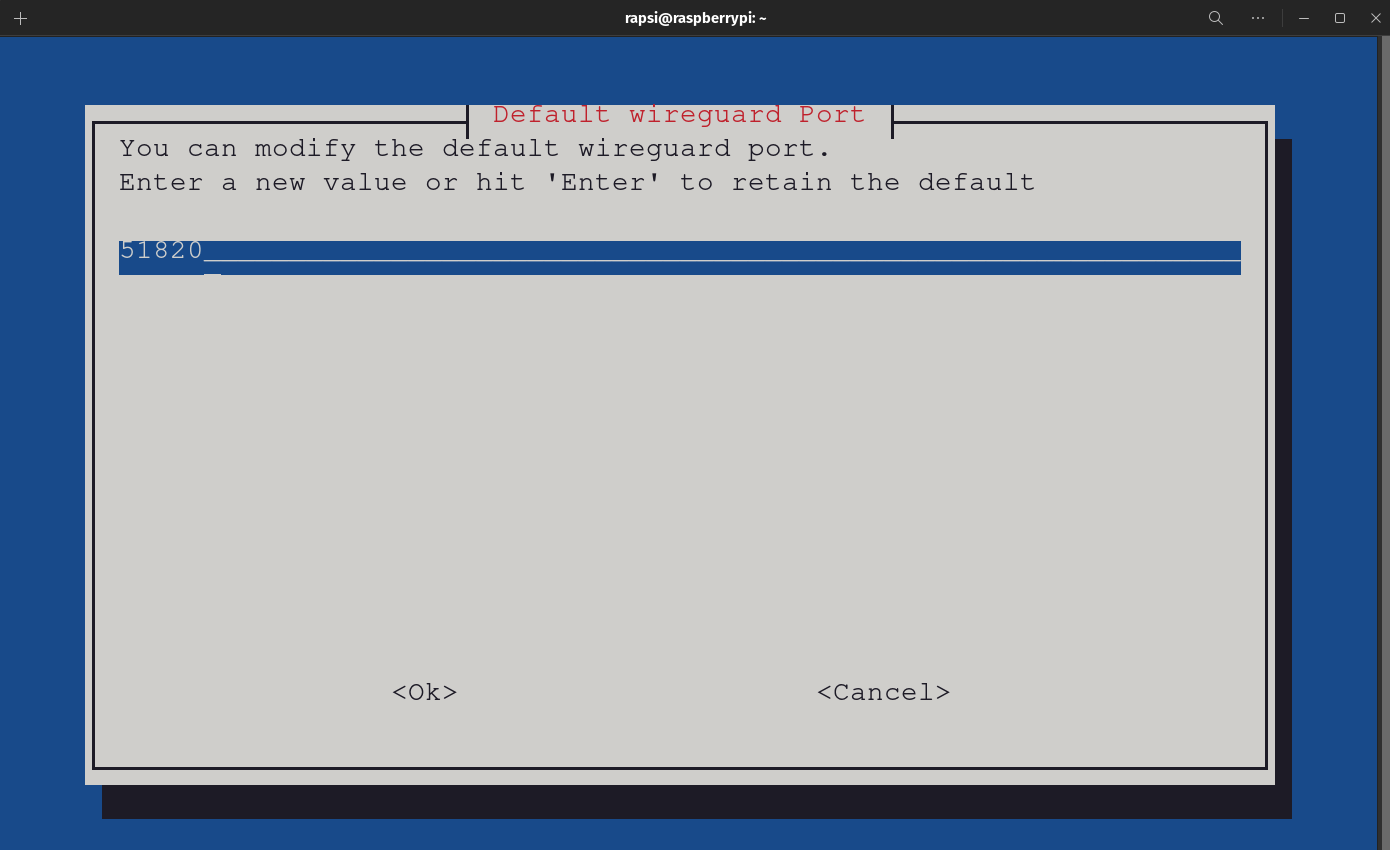
- Leave the default WireGuard port set to 51820 and select OK and YES on the next screen.
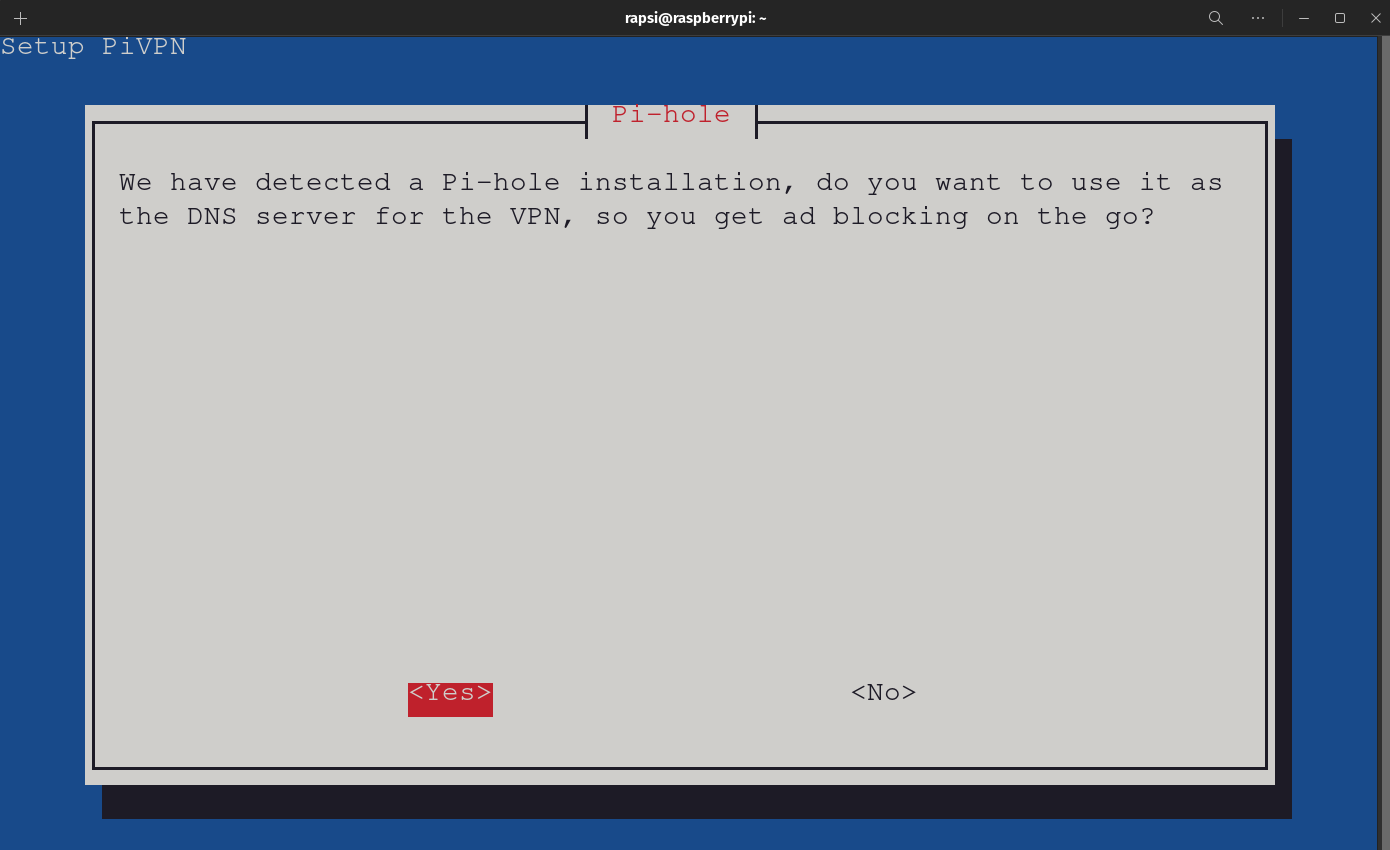
- Select Yes to use Pi-Hole as the DNS Server.
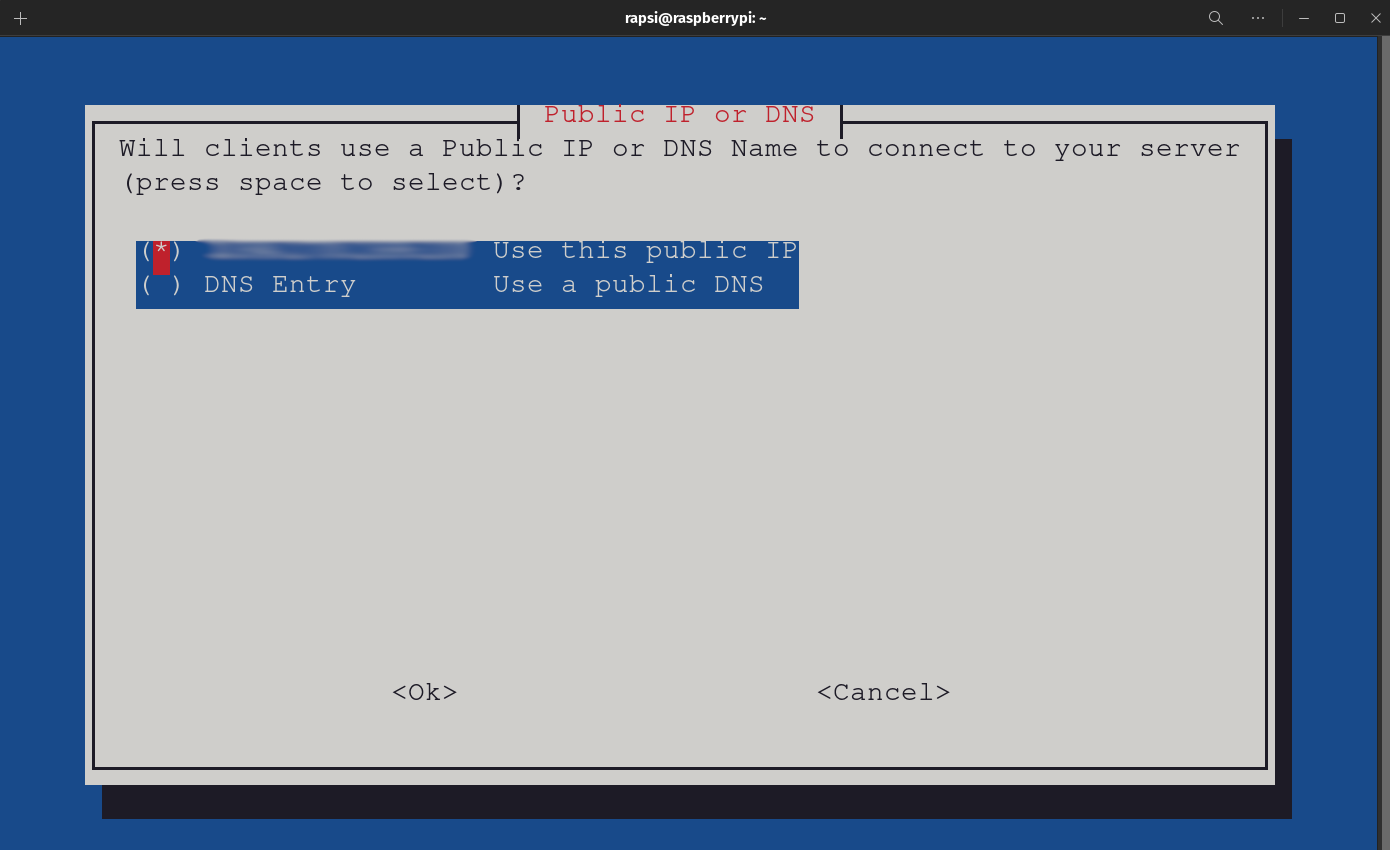
- The Public IP or DNS is very important. If you have a public static IP adress you can use it or use a DDNS entry that updates intself when and if your dynamic public IP address changes.
- Select Ok to generate your server keys.
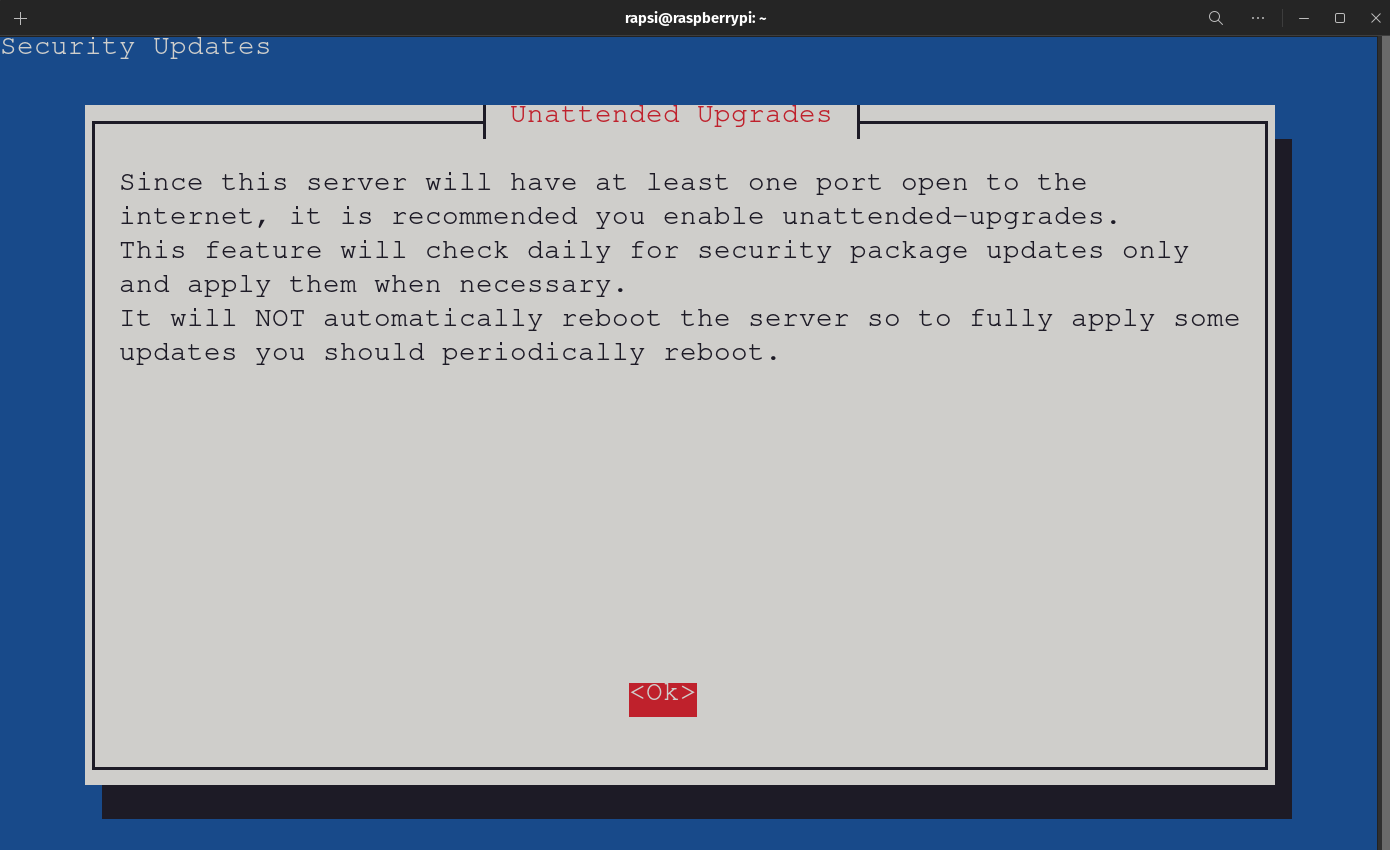
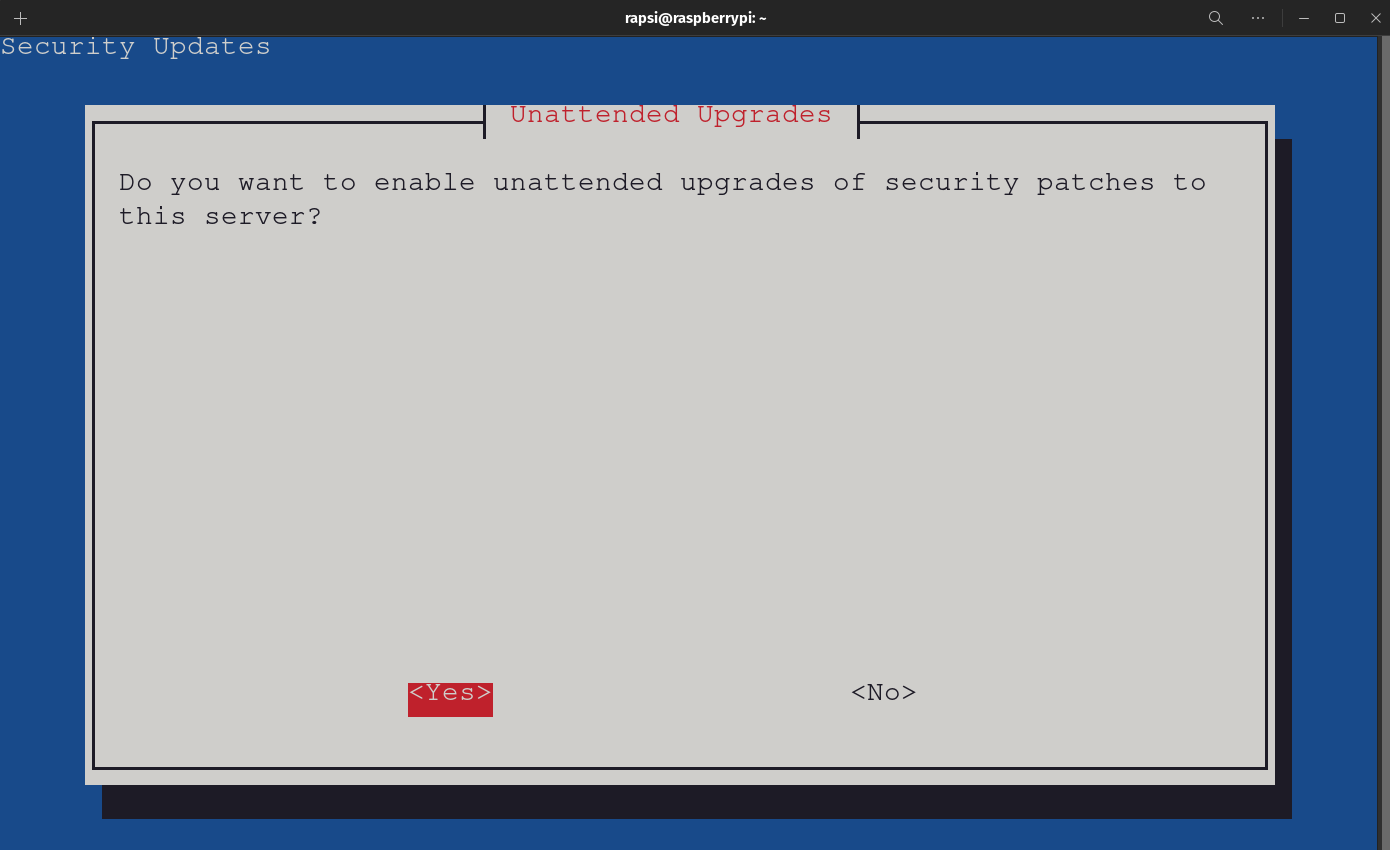
- I recommend to select Yes on the Unattended Upgrades screen.
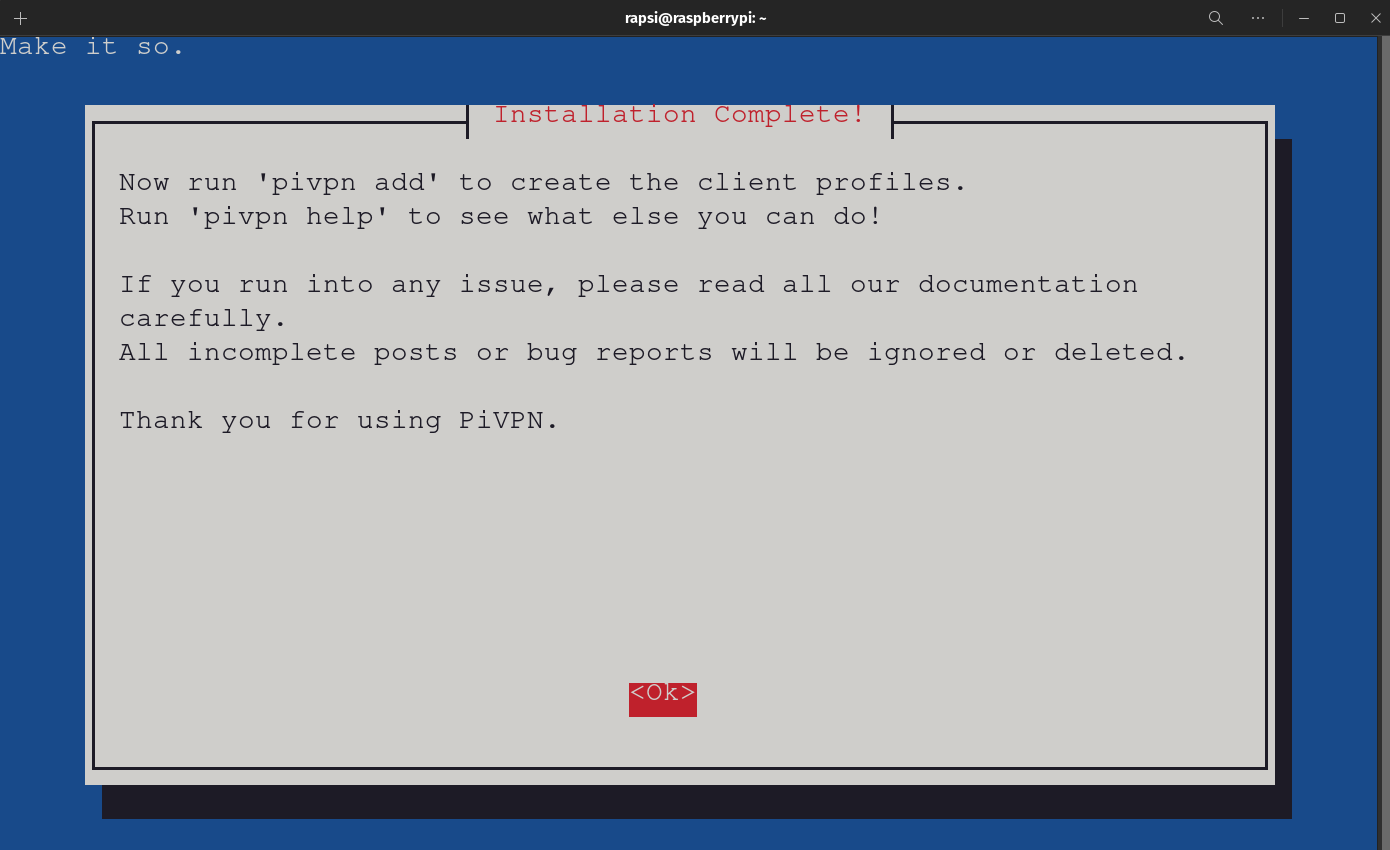
- Hit Ok to complete the isntallation, Yes to reboot, and OK.
Below are some images of this part of the process, we still need to set port-forwarding rules in the router, add clients the clients to Wireguard and set the clients on our devices. The next steps will be after the images.
Follow these steps to finalize our setup:
- Lets get our clients ready by going to your app store and searching for WireGuard, or you can click HERE to download the client software for your device and OS.
- Log into your routers admin webpage. Find your port forwarding seetings. Use the IP Address you set for your pi to add a rule for Pi-Hole set to port 53, and one for WireGuard for port 51820 with UDP protocol. Make sure you save this settings.
- Open your command prompt (Windows) or your terminal (MacOS/Linux) and SSH into your Raspberry Pi.
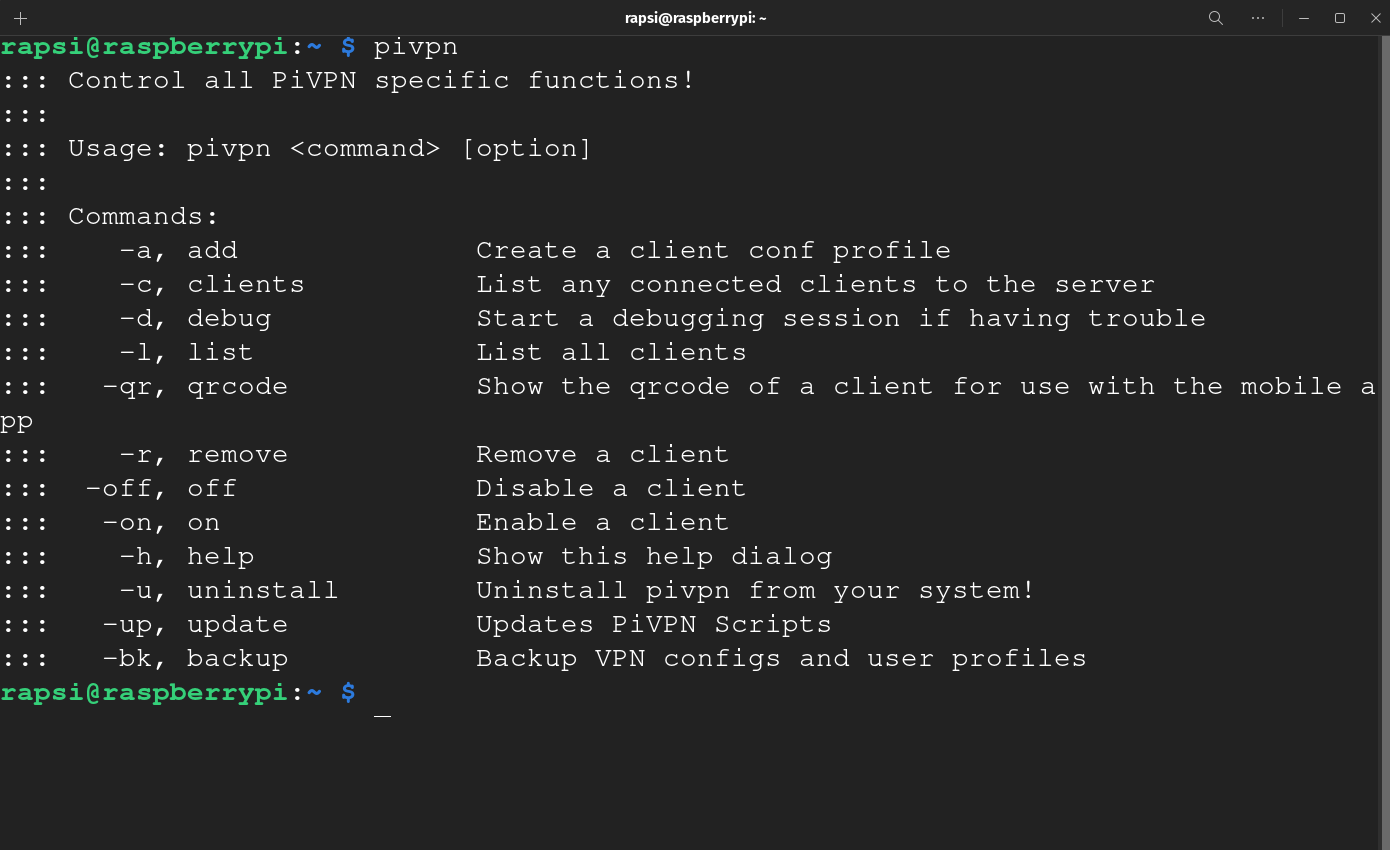
- Type in pivpn and hit enter, you should see a list of options. We are going to use -a to add a client.
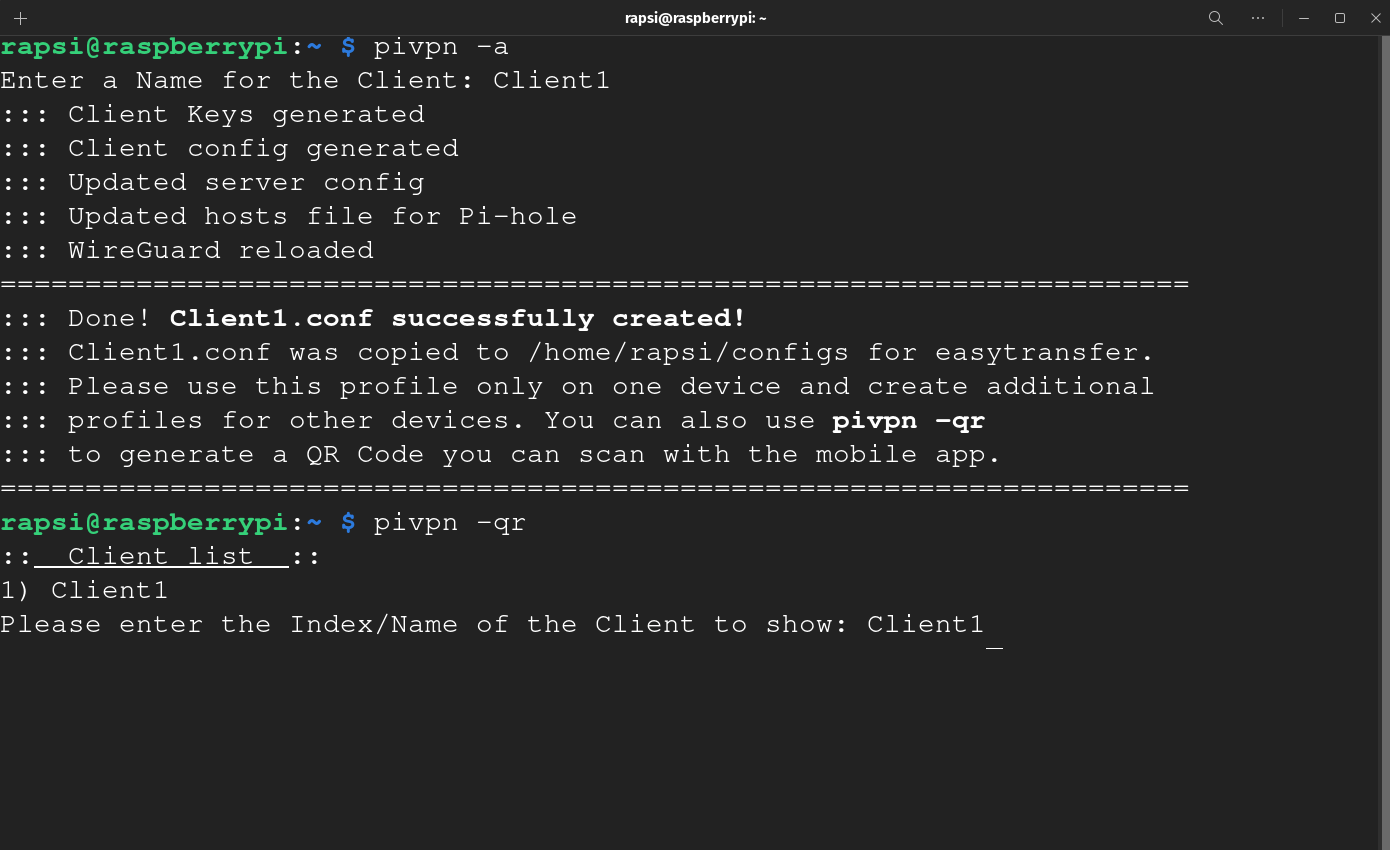
- Type in pivpn -a and hit enter. Enter the name for your client and hit enter. Create client name for every device you are going to connect. We can see were the file is created, it should be in /home/USERNAME/configs and we are going to use this information in the next steps.
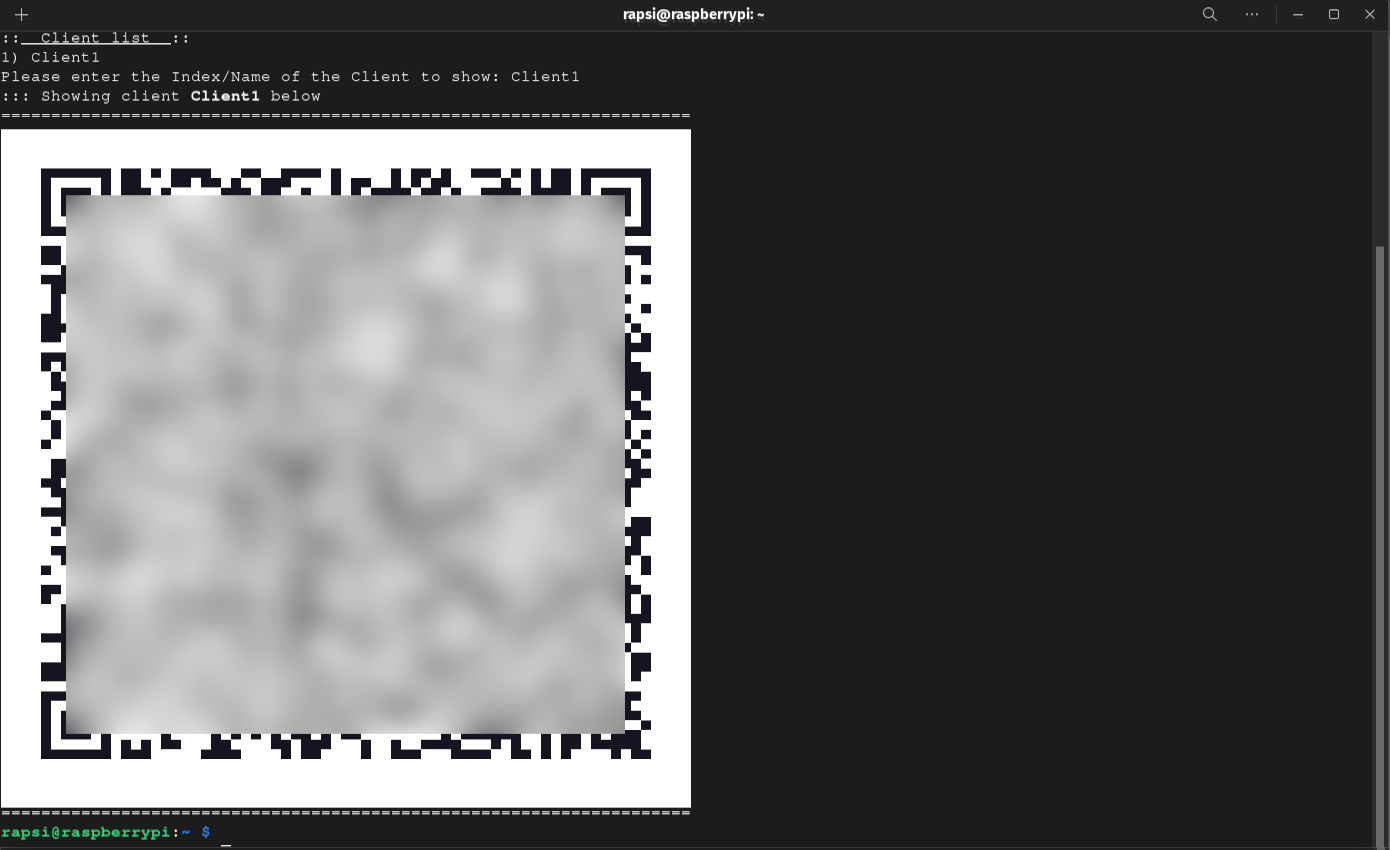
- We are going to generate QR codes for our mobile clients first. Type in Type in pivpn -qr and hit enter. Type in the name of the client you want to generate the QR for and hit enter.
- On your mobile device, look for the WireGuard app, hit Add or +, and Create from QR Code and follow the promts.
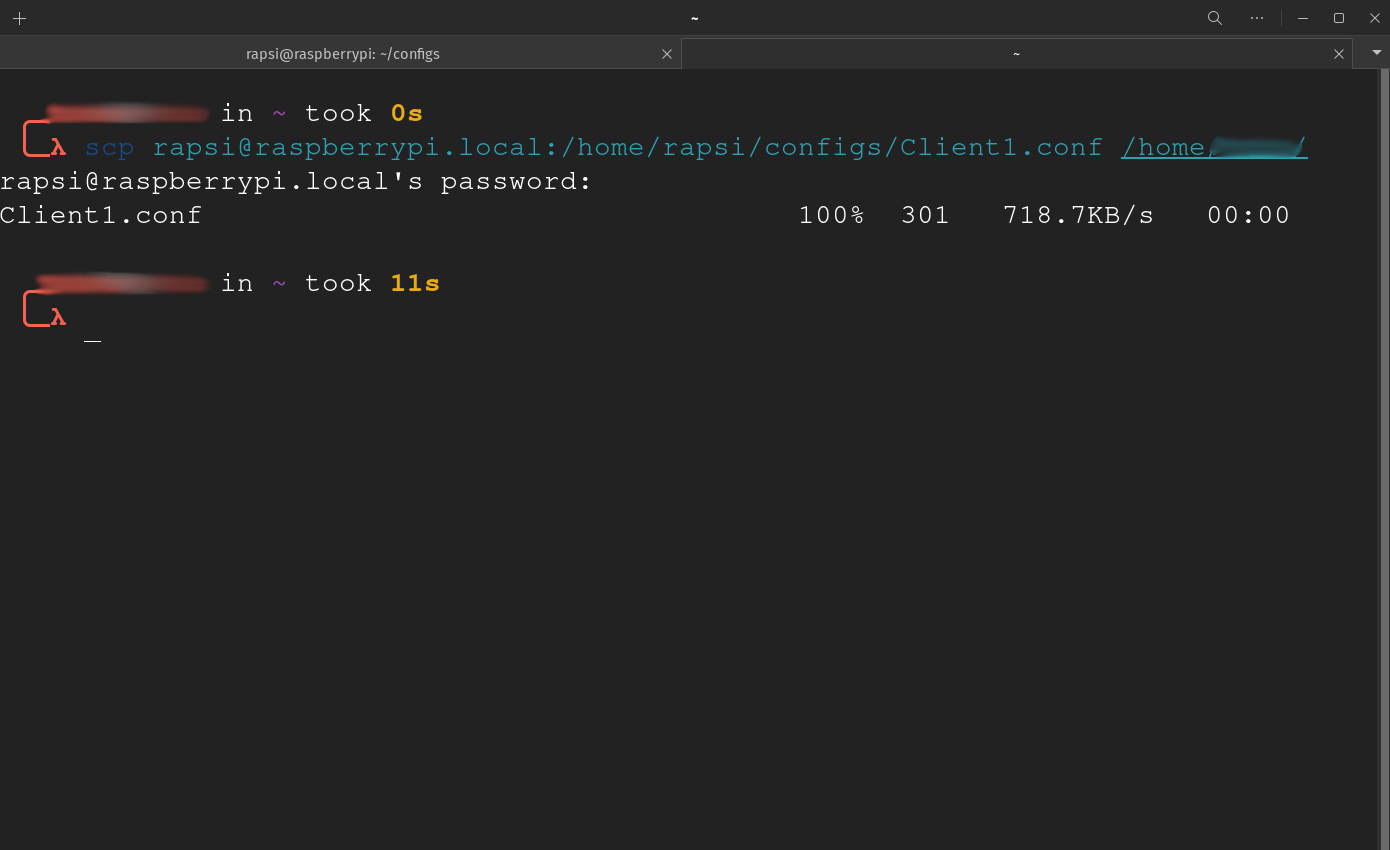
- For other devices, like adesktop or laptop, we need to copy the files from the Raspberry PI. We can use SCP (Secure File Copy) from the command promt or terminal: scp yourUsername@yourRaspberry_IP:/home/yourUsername/configs/FILENAME.conf where_ you_want_the_file_in_your_computer. An example for windows could be scp rapsi@raspberrypi.local:/home/rapsi/configs/Client1.conf C:\ to copy the file to your C:\ drive.
- On your computer, start the WireGuard app and click on import from file and find the file we copied from our Raspberry Pi.
- You can activate and deactivate your VPN connection now and you are all set!